Introduction
Thank you for purchasing this theme. This documentation consists of several parts and covers the entire process of installing and setting up theme starting from scratch.
We did our best to make this documentation as clear as possible. However, if you have any difficulties with this theme or any suggestions on improving the template or the documentation, please contact our customer support via the feedback form on this page or send an email to nordthemes@gmail.com
First Steps
After purchasing a theme from ThemeForest, you need download and install it on your website. This tutorial will show you how to do that very quick and easy.
Download a theme from ThemeForest
After you completed the purchasing a theme on ThemForest, a download button will appear. Click on that button to download the theme and save the package on your computer.
If you did not download the theme after purchase, you need log into your account on ThemeForest and navigate to a Downloads page. The downloads section displays a list of all the items purchased using your account.
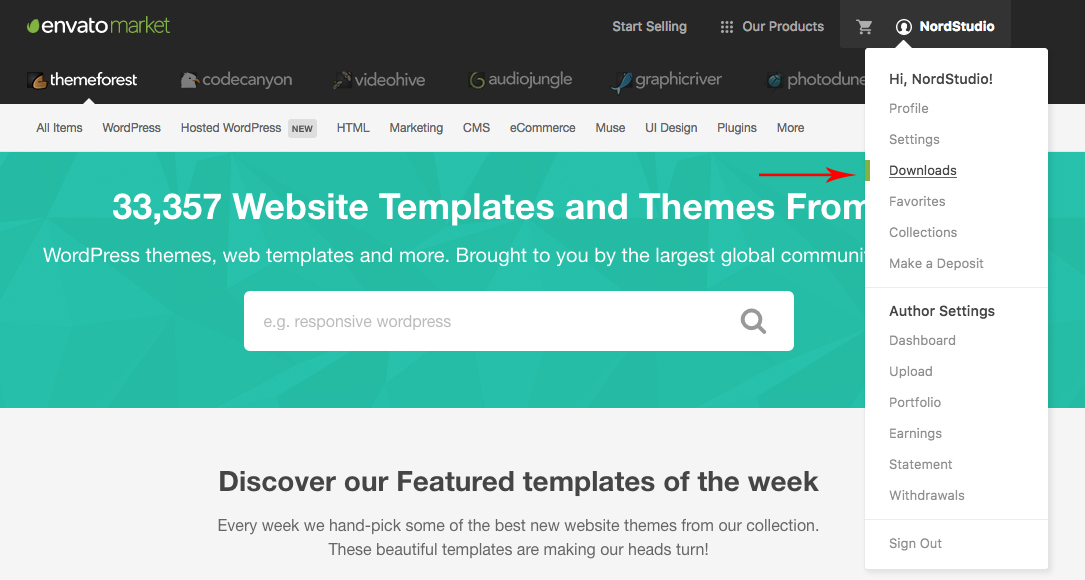
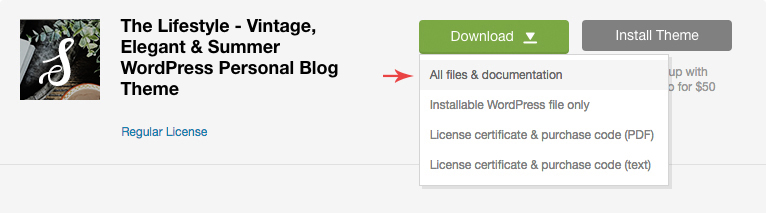
Click the Download button next to the item and select All files & documentation which contains all files, or Licence Certificate and Purchase Code for the item licence information only.
Save the package on your computer. The downloaded file will be named something like this
themeforest-21614603-weeland-lifestyle-wordpress-blog-theme.zip
Unpacking
Extract the downloaded .zip package using your standard zip software. When the extraction is completed you should have a folder with the following folders and files inside:

- Theme Files — This folder contains
weeland.zipfile. This is the parent WordPress Theme, install this via WordPress. If you install it via FTP then unzip it first, then use the extracted folder. - Child Theme — This folder contains the
weeland-child.zipfile. The child theme is only for users who make code changes. - Documentation — Theme documentation.
- Licensing — Theme license files.
Installing a Theme
You can install the theme in two ways: through WordPress, or via FTP.
Install via Dashboard
- Log in to the WordPress Administration Panels.
- After you have logged in, navigate to the Appearance > Themes.
Click the
Add Newbutton on the top of the screen.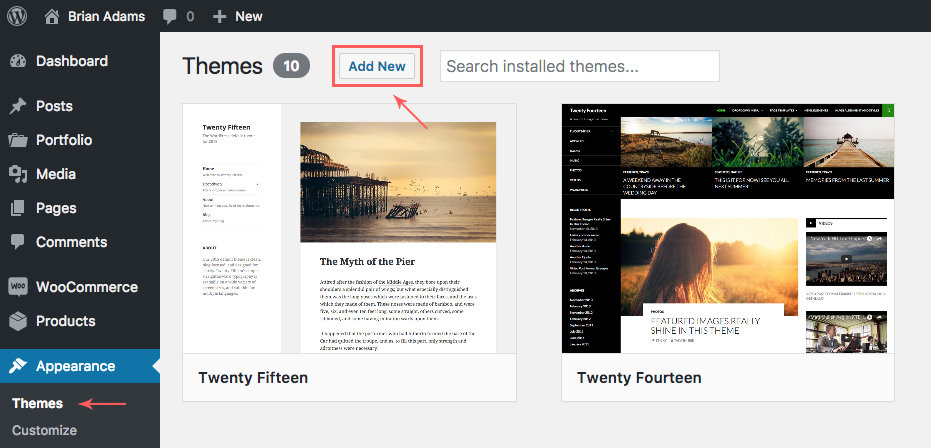
-
On the next page, click the
Upload Themebutton on the top of the screen.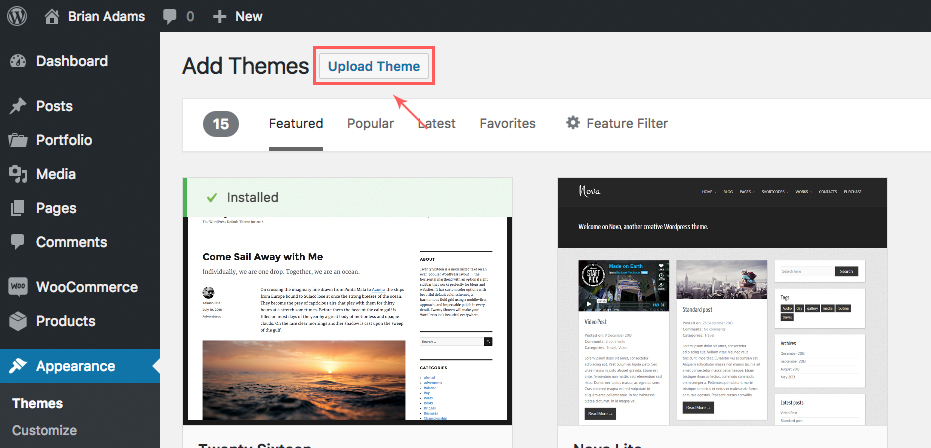
- Click the
Choose Filebutton to open up a dialog to browse your computer and navigate to Theme Files folder (it is located in the extracted package folder). Select the fileweeland.zipand clickInstall Now. Please wait a few seconds, WordPress will upload and extract the theme archive for you. All you need to do next is to press the
Activatelink under the message for successful theme installation.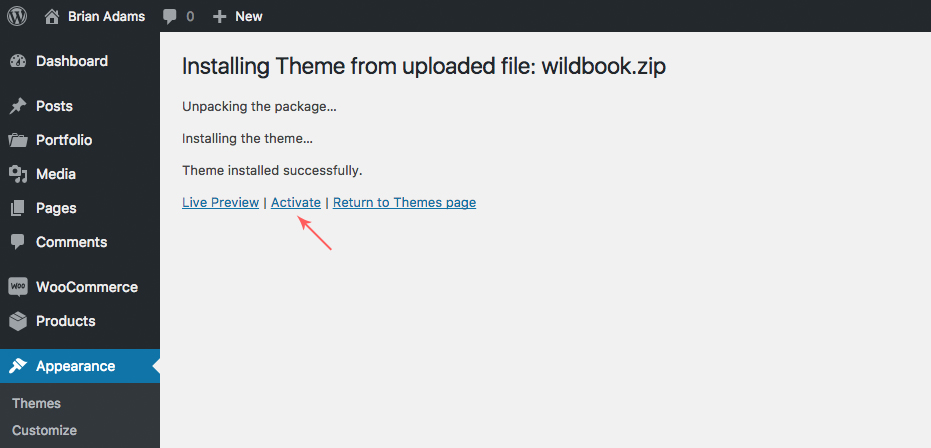
- Done! Now you can open the homepage of your site and see the newly activated theme.
Install via FTP
- Navigate to the Theme Files folder (it is located in the extracted package folder) and extract the file
weeland.zipusing your standard zip software. - Using an FTP client to access your host web server.
- Go the the WordPress root folder on your server, then go to
/wp-content/themes/folder. - Upload the
weelandfolder that you extracted from the zip into the themes folder. - Log in to the WordPress Administration Panels.
- Navigate to the Appearance > Themes. On this page you should see the Weeland in the list of themes.
-
Move the cursor on the block with the Weeland theme and click the
Activatebutton.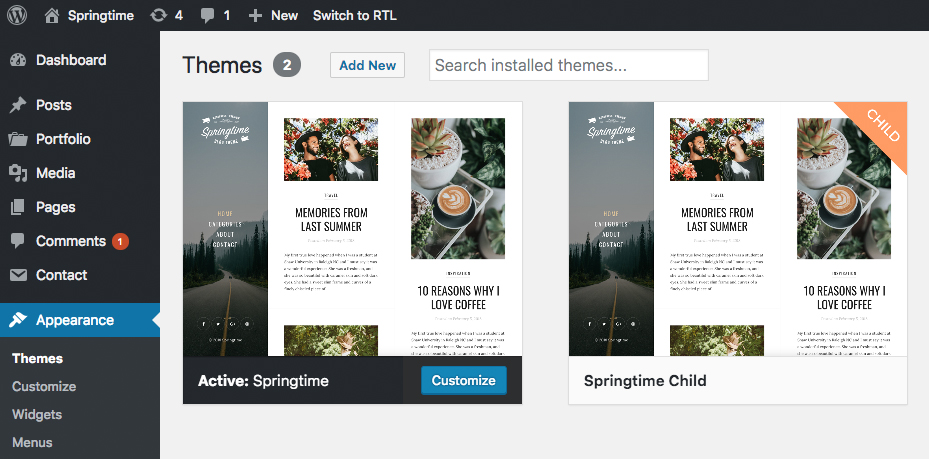
- Done! Now you can open the homepage of your site and see the newly activated theme.
Installing Plugins
This theme requires the installation and activation of some plug-ins to add additional features and capabilities. If you want to use instagram, contact form, newsletter and share buttons, you need to install the following plugins:
- Smash Balloon Instagram Feed — Widget for displaying your latest Instagram photos;
- Weeland Add-ons — The plugin extends the functionality for the Weeland theme. Adds some metaboxes to control the sidebar background and display options for some post elements.
- Weeland Share Buttons — A simple plugin that enables you to add Share buttons.
- Contact Form 7 — Contact form plugin;
- MailChimp for WordPress — MailChimp for WordPress by ibericode. Adds various highly effective sign-up methods to your site.
Installing Plugins
- Log in to the WordPress Administration Panels.
- Navigate to the
Appearance > Install Pluginsmenu. Check the boxes next the plugins name that you want to install. In the drop-down menu located next to the
Applybutton select Install and click theApplybutton.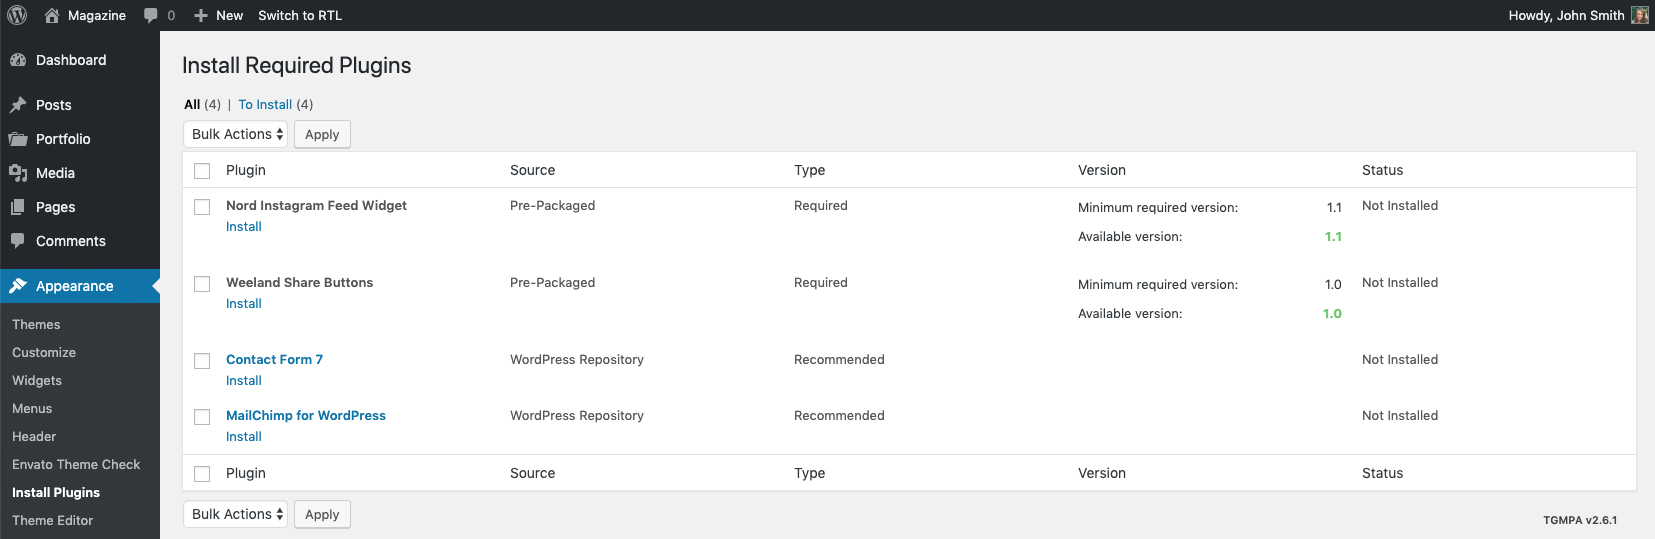
Wait a few minutes and click the
Return to Required Plugins Installerlink.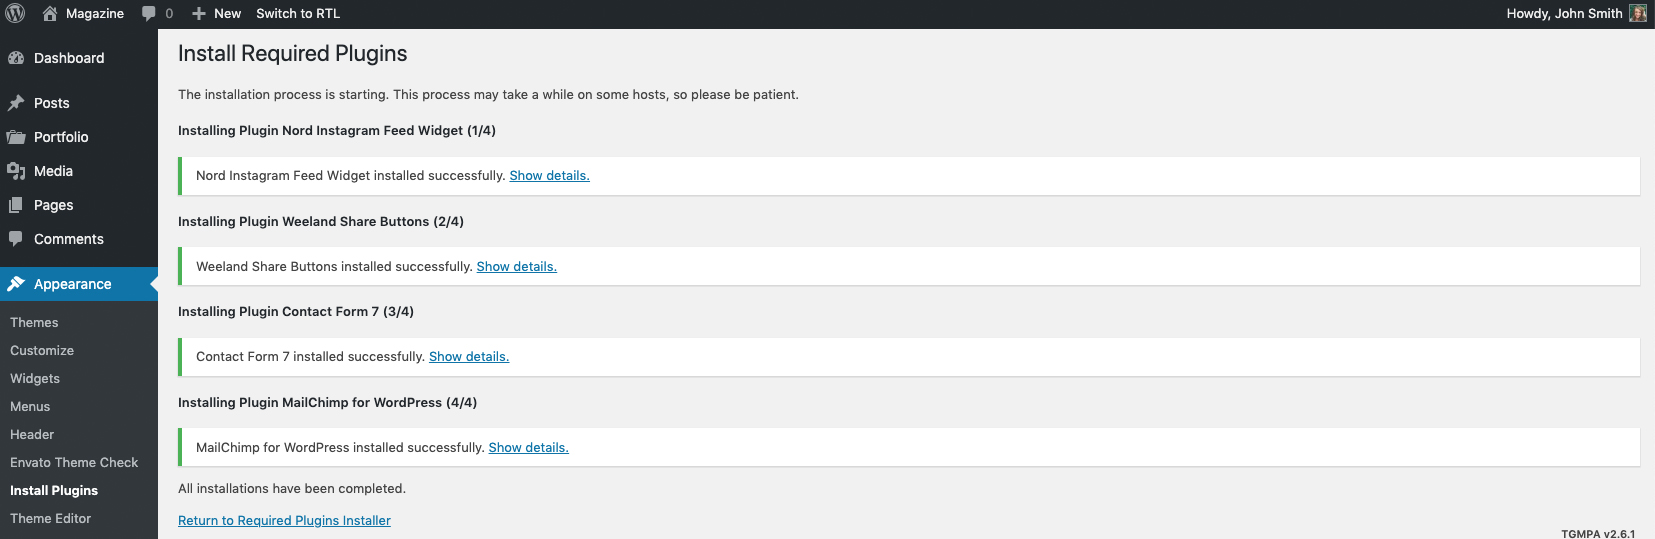
Check the boxes next the installed plugins name. In the drop-down menu located next to the
Applybutton select Activate and click theApplybutton.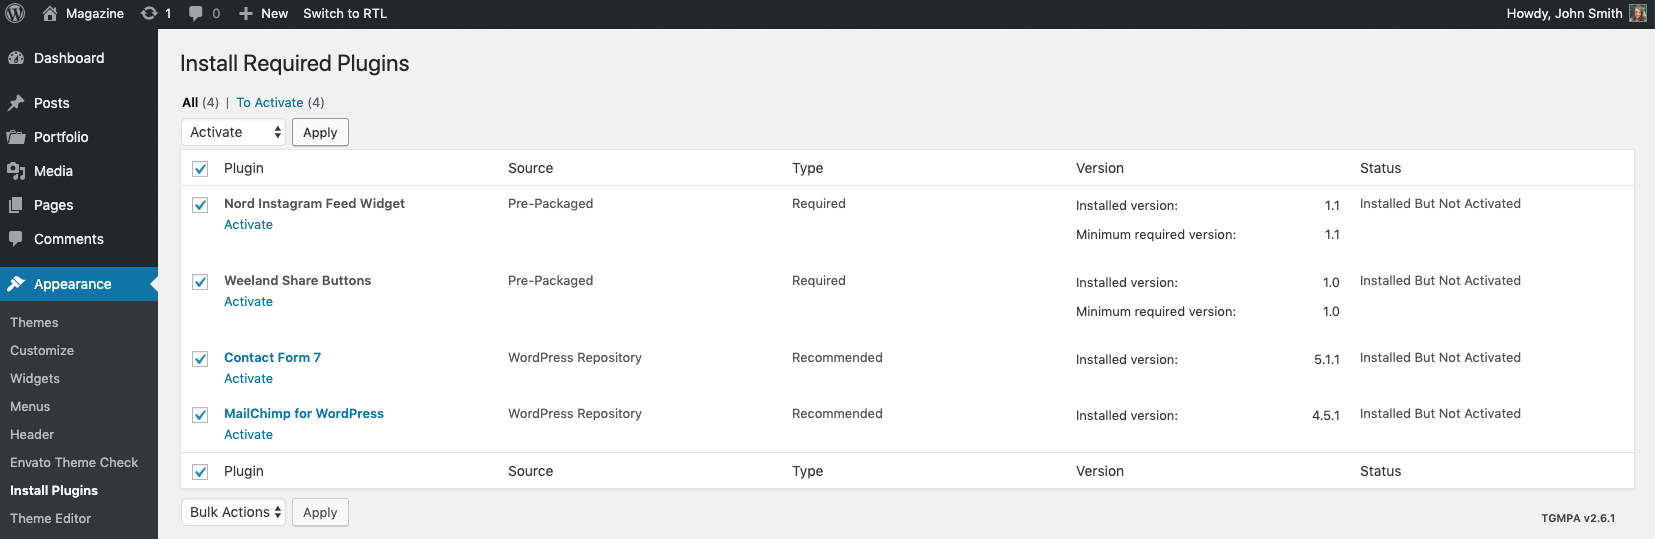
- Now the plugins are activated and you can use them.
Updating Theme
To update the theme, login to your marketplace account and re-download the theme package like you did when you purchased it. Extract the downloaded ZIP file.
- Log in to the WordPress Administration Panels.
- Navigate to the Appearance > Themes menu.
- Since WordPress does not recognize that the theme is already installed when you upload a new zip file, you will get a ‘Theme Destination already exists’ error if you try to install the theme. Therefore you have to deactivate and delete the old theme and afterwards install and activate the new theme version.
- Deactivate the theme by activating another.
Click on the screenshot of the Weeland theme. This will open the
Theme Detailspopup box.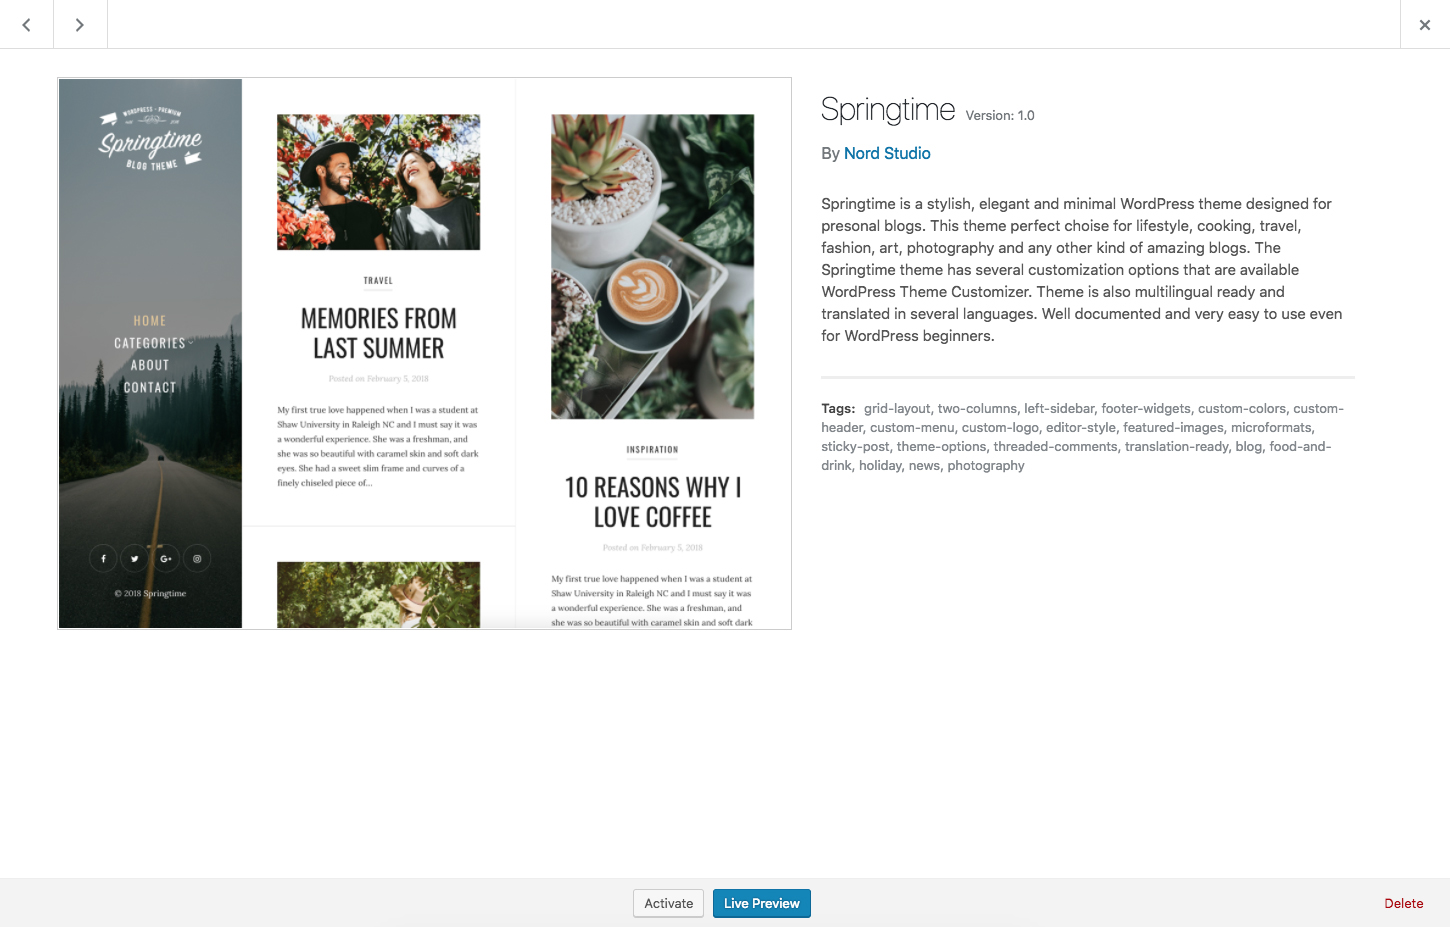
- Click on the
Deletebutton in the bottom right corner to remove all theme files. - Upload the new version
weeland.zipand install the theme.
Child Theme
A child theme is a theme that inherits the functionality and styling of another theme, called the parent theme. Child themes are the recommended way of modifying an existing theme.
Why use a Child Theme?
There are a few reasons why you would want to use a child theme:
- If you modify a theme directly and it is updated, then your modifications may be lost. By using a child theme you will ensure that your modifications are preserved.
- Using a child theme can speed up development time.
- Using a child theme is a great way to learn about WordPress theme development.
Child Theme Install
- Log in to the WordPress Administration Panels.
- Navigate to the Appearance > Themes menu.
- Click the
Add Newbutton on the top of the screen. - On the next page, click the
Upload Themebutton on the top of the screen. - Click the
Choose Filebutton to open up a dialog to browse your computer and navigate to Child Theme folder (it is located in the extracted package folder). Select the fileweeland-child.zipand clickInstall Now. - Please wait a few seconds, WordPress will upload and extract the theme archive for you. All you need to do next is to press the
Activatelink under the message for successful theme installation. - That's it! Now you can add custom CSS code and PHP functions.
How to use the child theme
- After install the child theme navigate to Wordpress admin panel.
- Navigate to the Appearance > Editor menu.
- In the section titled
Templates, you will see a list of files that you can edit: functions.php— This lets you add additional functions, classes and hooks to Wordpress theme without needing to alter the code within the functions file of the parent theme.style.css— This lets you add or change the theme styles (colors, sizes, fonts, backgrounds etc.) without needing to change the code within the style.css file of the parent theme.- Select the file you want to change and add your PHP/CSS code in the editor on the left side.
- Click the
Update Filebutton when you're finished editing a file.

Navigation Menus
Weeland theme supports the custom navigation menus. You can add a menu to header of your site. WordPress comes with a simple user interface that makes it quite easy for beginner users to create and manage menus.
Creating Menus
- Log in to the WordPress Administration Panels.
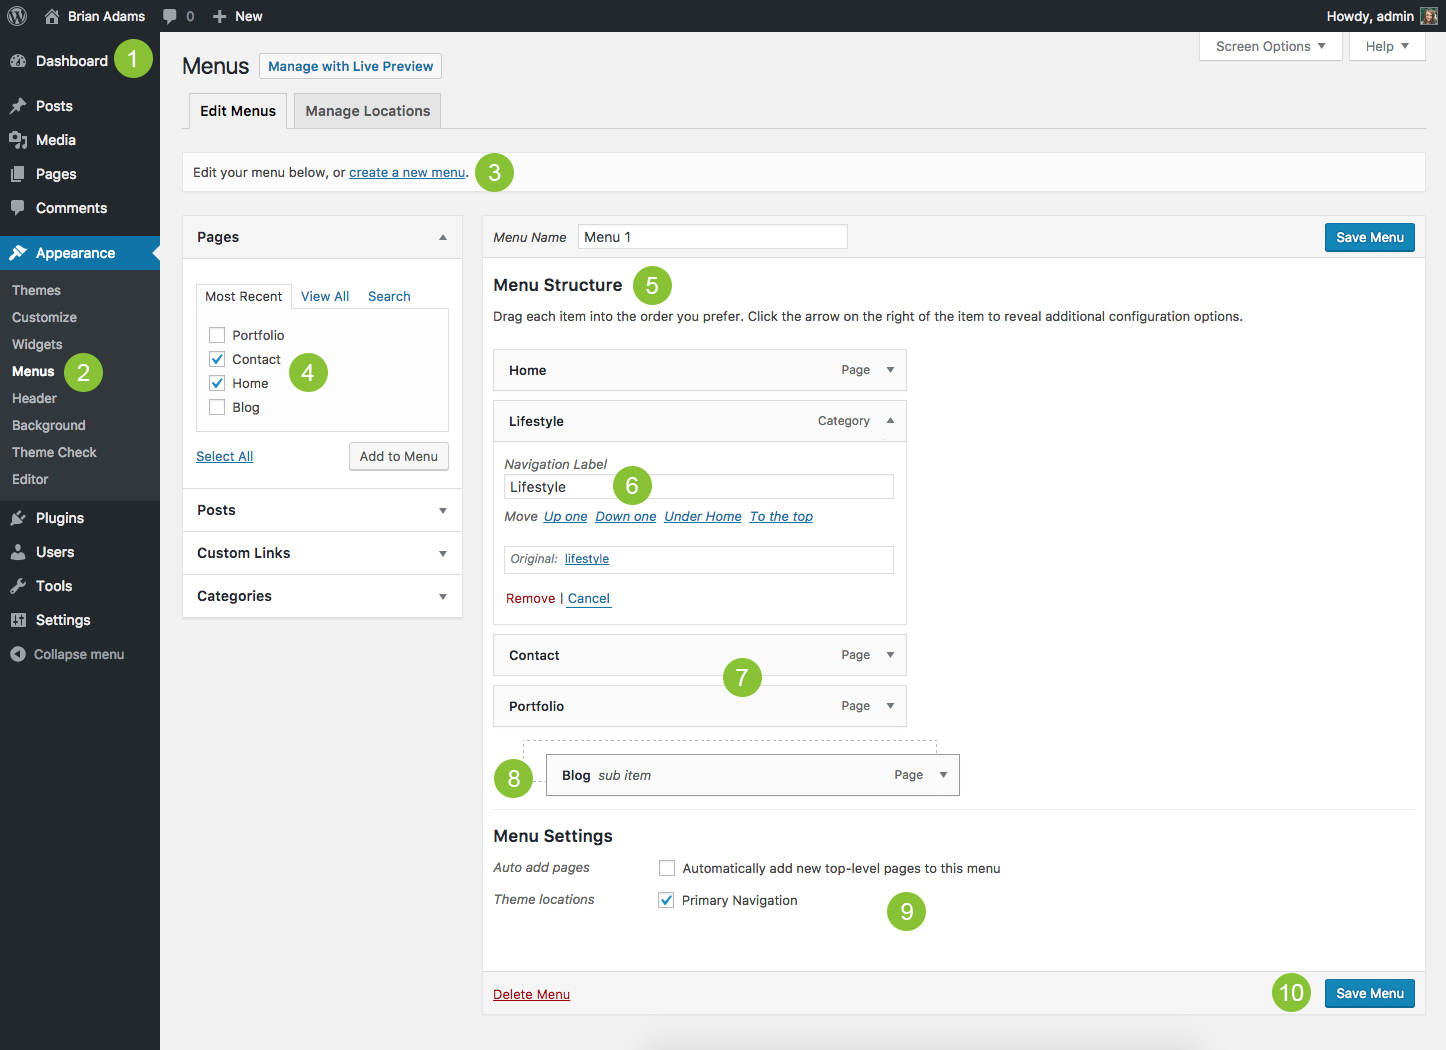
- Navigate to Appearance > Menus section.
- If you don’t have any menus, click the
Create Menubutton and create a new menu. - From the blocks on the left side select pages that you want to add in your menu. Click the
Add to Menubutton. - Once you've added a few items to your menu, you will see the added menu items on the right side in the
Menu Sctructuresection. - If you want to rename a menu item, click the down arrow of a menu item to display its properties. You can then edit the navigation label that is displayed on menus.
- You can also change the order of menu items. Whilst holding the left mouse button, drag menu item to the top or bottom.
- To create a drop down menu drag a menu item slightly to the right of the menu item above it to create a sub item relationship in the menu.
- Scroll to the bottom of the menu editor window. In the section titled
Theme locations, click the check box for the location where you want your menu to appear. - Click
Save Menubutton.
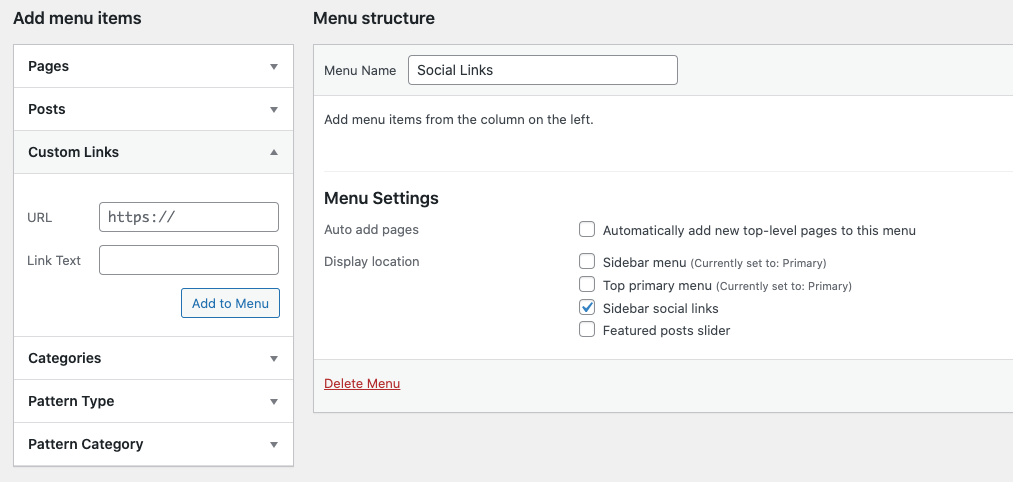
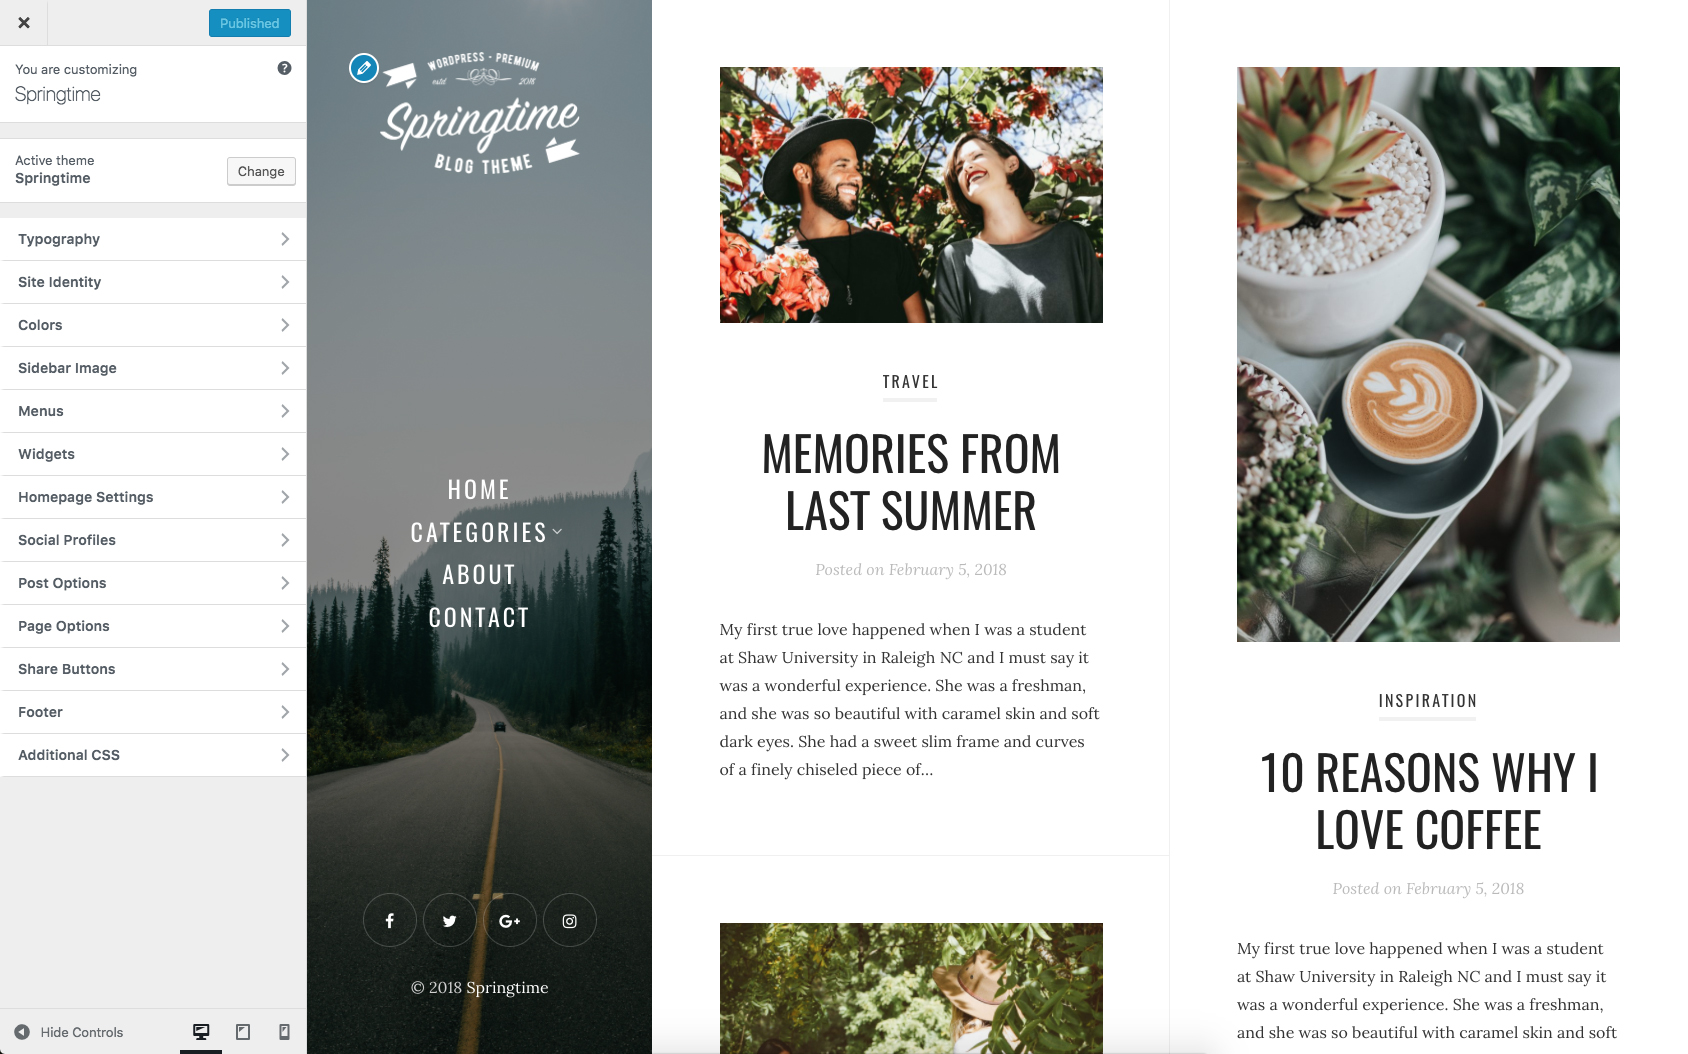
Social Links Menu
To add links of your social networks to the sidebar of the site, follow these instructions:
- Log in to the WordPress Administration Panels.
- Navigate to Appearance > Menus section.
- Click the
Create a new menubutton. Enter a name for the menu (eg Social Links) and check the box "Social".

- Click the "Create Menu" button.
After the menu is created, open the Custom Links tab in the Add menu items block.
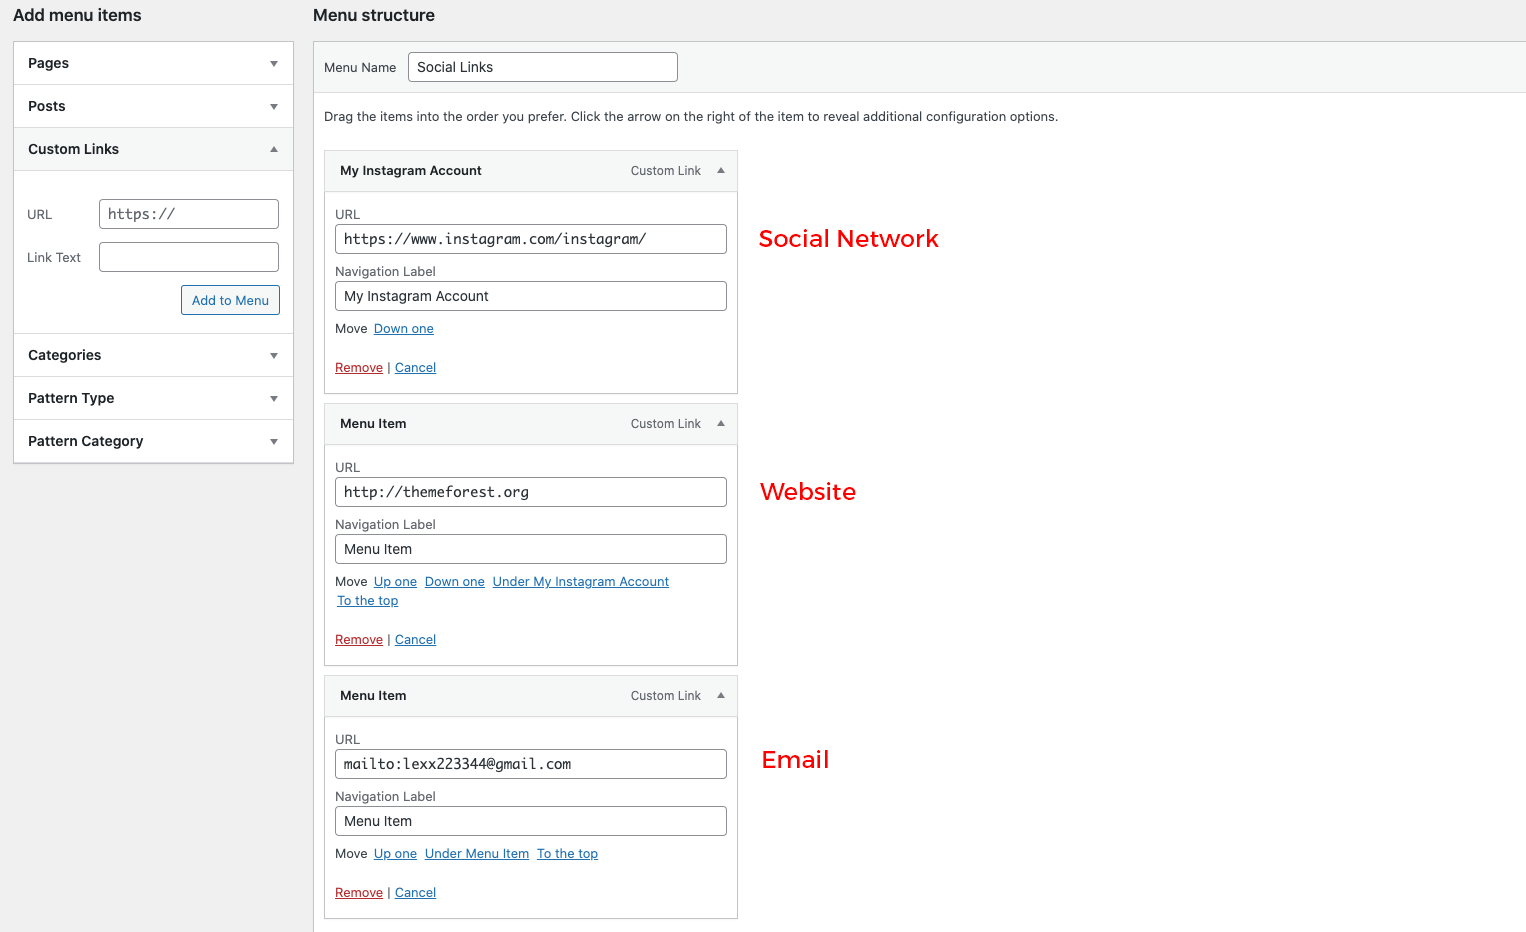
Enter the URL of your social account page in the
URLfield. URL of the page must necessarily contain the domain of the social network. For example, www.instagram.com/instagram.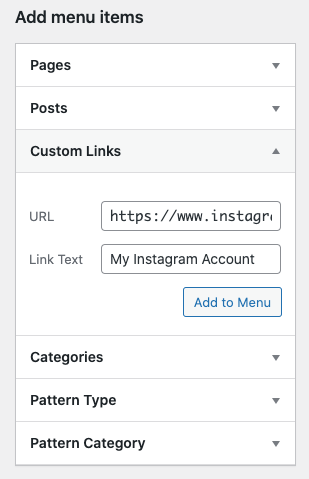
- In addition to social networks, you can add links to any web page or your contact email to the menu. To add an email, enter in the URL field your email address with mailto: prefix, eg
mailto:nordthemes@gmail.com - After you have added the URL, click the
Add to menubutton. Repeat step 7 and 8 for all of your other social networks.
- When you're done click the Save Menu button.
How to add links to WhatsApp, Facebook Messenger and Telegram.
URL addresses for these social networks should be in the following format:
- WhatsApp -
https://wa.me/<number>, where <number> is a full phone number in international format. Do not use parentheses, hyphens, plus signs, and leading zeros when entering a phone number in international format. - Facebook Messenger -
http://m.me/<PAGE_NAME>, where <PAGE_NAME> is the handle of the Facebook page the app is linked to. - Telegram -
http://t.me/<USER_NICKNAME>, where <USER_NICKNAME> is username.
Customization
Weeland theme is fully customizable. Using the Options panel, you can change the layout, colors, background image, etc.
Customizer
Weeland theme supports the Wordpress Customizer. The Customizer is a framework for live-previewing any change to WordPress. It provides a simple and consistent interface for users to customize various aspects of their theme and their site, from colors and layouts to widgets, menus, and more. Themes and plugins alike can add custom options to the Customizer. The Customizer is the canonical way to add options to your theme.
To access the Wordpress Customizer, log in to the WordPress Administration Panels and navigate to Appearance > Customize.
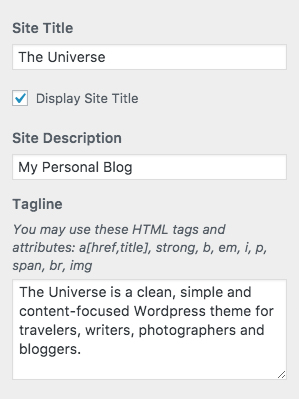
Site Title & Tagline
To change the site title, tagline and description, follow these steps:
- Log in to the WordPress Administration Panels.
- Navigate to the Appearance > Customize menu.
- Open the
Site Identitytab. - On this tab you will see three input fields:
- Site Title — displayed in the header and in the browser tab.
- Site Description — displayed in the browser tab after the site title.
- Tagline — displayed in the header under the site title or logo.
- Enter your custom the site title, description and tagline. In the tagline field you can use HTML tags.
- Click Save & Publish button.
Logo
The logo is displayed in the header of the site. You can set any image as a logo and change its size. Follow the below steps to set logo in your site:
- Prepare the logo image file (PNG or JPEG).
- Log in to the WordPress Administration Panels.
- Navigate to Appearance > Customize menu.
- Open the
Site Identitytab. - Click
Select Logobutton in Logo section, upload the image file you prepared in the above step from Upload Files tab screen, and clickSelect and Crop. - Crop the image or click the
Skip Croppingbutton. - Change the logo size using range slider in the
Logo Sizesection. - Click «Save & Publish» button.
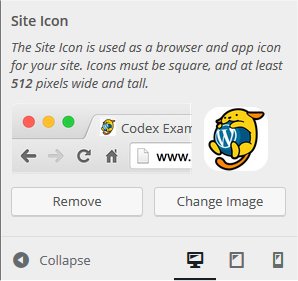
Favicon
Follow the below steps to set favicon in your site.
- Prepare image file. It must be square, and at least 512 pixels wide and tall.
- Log in to the WordPress Administration Panels.
- Navigate to Appearance > Customize menu.
- Open the
Site Indentitytab. - Click
Select Imageat Site Icon section, upload the image file you prepared in the above step from Upload Files tab screen, and clickSelect. - Click Save & Publish button.
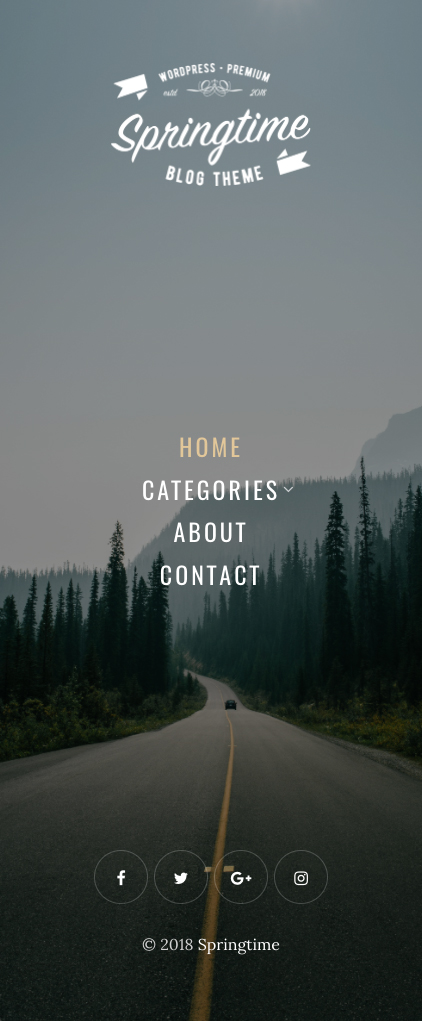
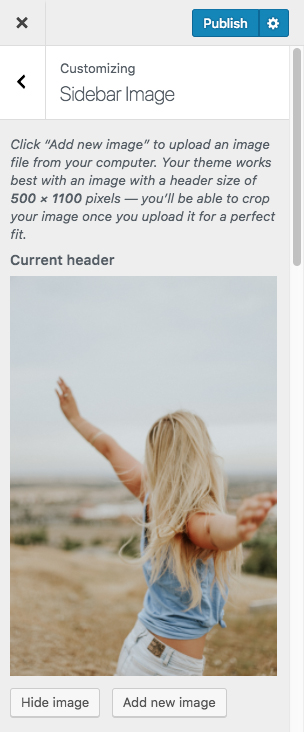
Sidebar Image
To change the background image of the sidebar of your site, follow these steps:
- Log in to the WordPress Administration Panels.
- Navigate to Appearance > Customize menu.
- Open the
Sidebar Imagetab. - Click the
Add new imagebutton on theCurrent headersection. - Select the image from Media Libraty tab or upload new image on Upload Files tab.
- Click the
Select and Cropbutton. - Crop the image or skip this step.
- When you finished click the Save & Publish button.
- You can also display multiple images in random order. To do this, upload more images and click
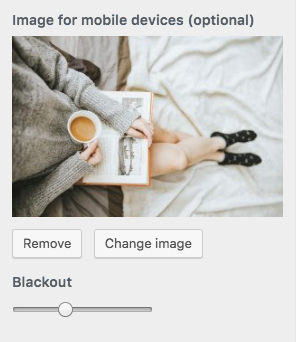
Randomize uploaded headers. - To make the background image lighter or darker, use the "Blackout" range slider.
- Also you can set an individual image for mobile devices when the sidebar is displayed in the site header and has a horizontal orientation. In the "Image for mobile devices (optional)" section click the "Select Image" button and select image.
- When you finish click the Publish button.
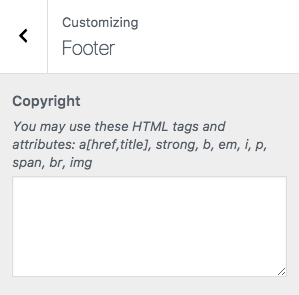
Copyright Text
The copyright text is displayed in the footer of the sidebar. You can change the copyright text using HTML tags.
- Log in to the WordPress Administration Panels.
- Navigate to the Appearance > Customize menu.
- Open the
Footertab. - Enter your custom copyright text. You may use these HTML tags and attributes:
a[href,title], strong, b, em, i, img[src,alt,title], p, span, br. - Click the Save & Publish button.
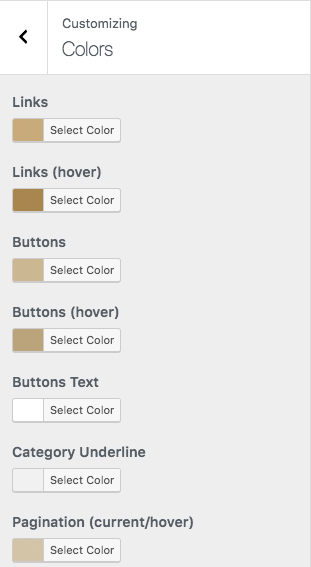
Colors
You can easily and quickly change the colors of some elements of the site. To create your color scheme, follow these steps:
- Log in to the WordPress Administration Panels.
- Go to Appearance > Customize.
- Open the
Colorstab. - Select the color you want to change and click button
Select Color. - By moving the circle on the colors area, select a color you want to use.
- Click Save & Publish button.
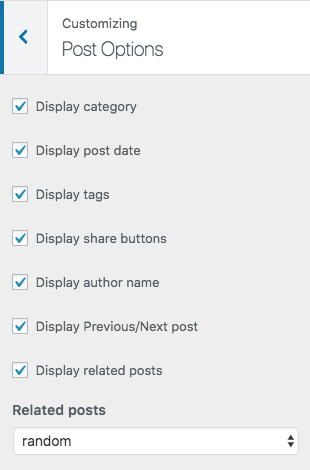
Post Options
In this section, you can configure the display options for a single post.
- Log in to the WordPress Administration Panels.
- Navigate to the Appearance > Customize menu.
- Open the
Post Optionstab. - Check the box next the meta info you want to display on the post page.
- Click Save & Publish button.
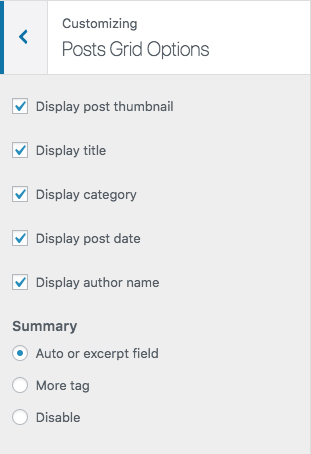
Posts Grid Options
In this section, you can configure the display options for a posts grid.
- Log in to the WordPress Administration Panels.
- Navigate to the Appearance > Customize menu.
- Open the
Posts Grid Optionstab. - Check the box next the element you want to display on the posts grid.
- Click Save & Publish button.
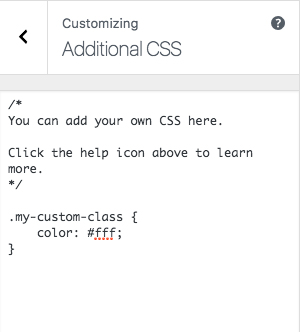
Custom CSS
You can quickly and easily add your custom CSS code. Your CSS code will have the highest priority and will override the primary styles.
- Log in to the WordPress Administration Panels.
- Navigate to Appearance > Customize menu.
- Open the
Additional CSStab. - Enter your custom CSS code.
- Click Save & Publish button.
Posts & Pages
Creating a post/page
Posts are entries that display in reverse order on your home page. Posts usually have comments fields beneath them and are included in your site's RSS feed. You can also create single pages that do not appear in the list of blog posts, but can be added to the site menu (eg. About Me page)
To write a post/page:
- Log in to your WordPress Administration Panel (Dashboard).
- Click the «Posts» tab (or «Pages» tab to create a single page).
- Click the «Add New» sub-tab.
-
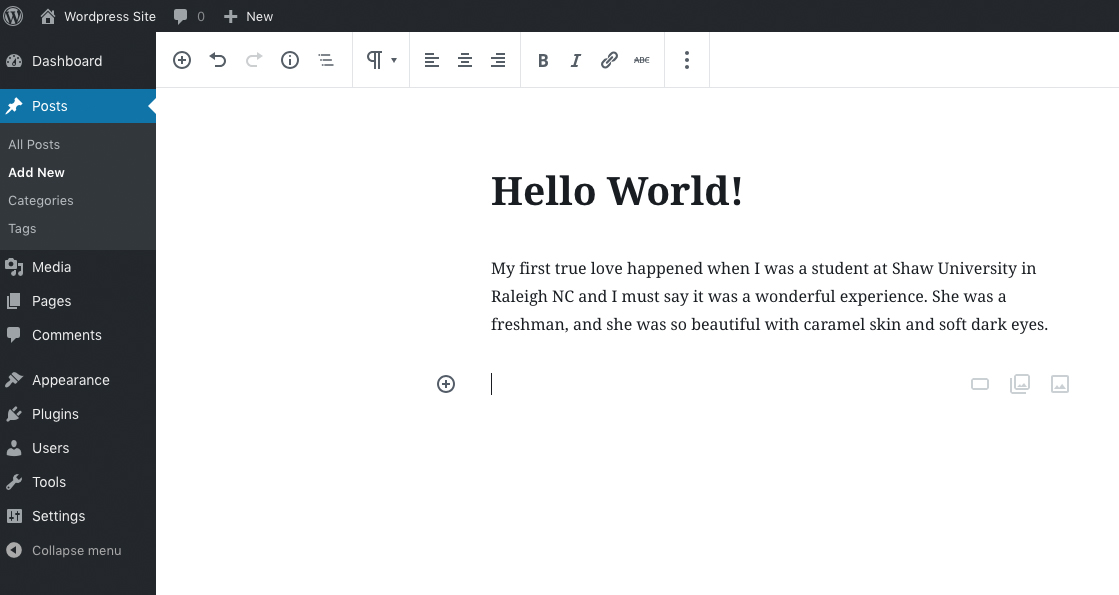
On the next page you will see the post editor:

- Start filling in the blanks: enter your post title in the upper field, and enter your post body content in the main post editing box below it.
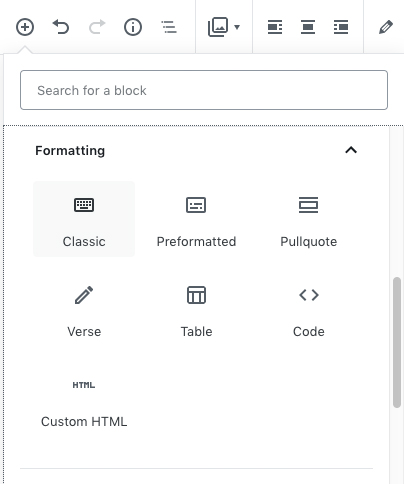
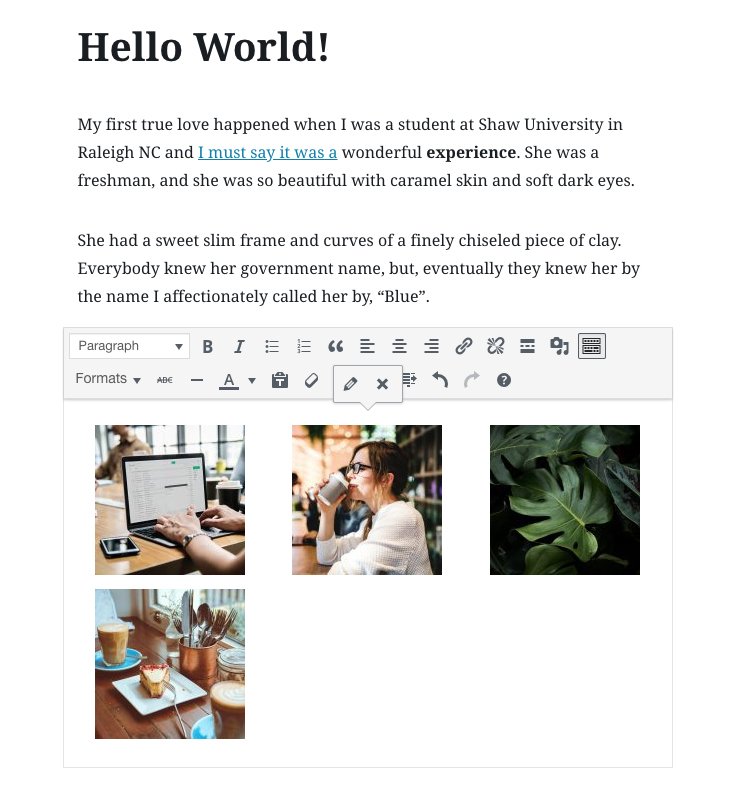
To add more different content blocks, click the Plus button located in the upper left corner:
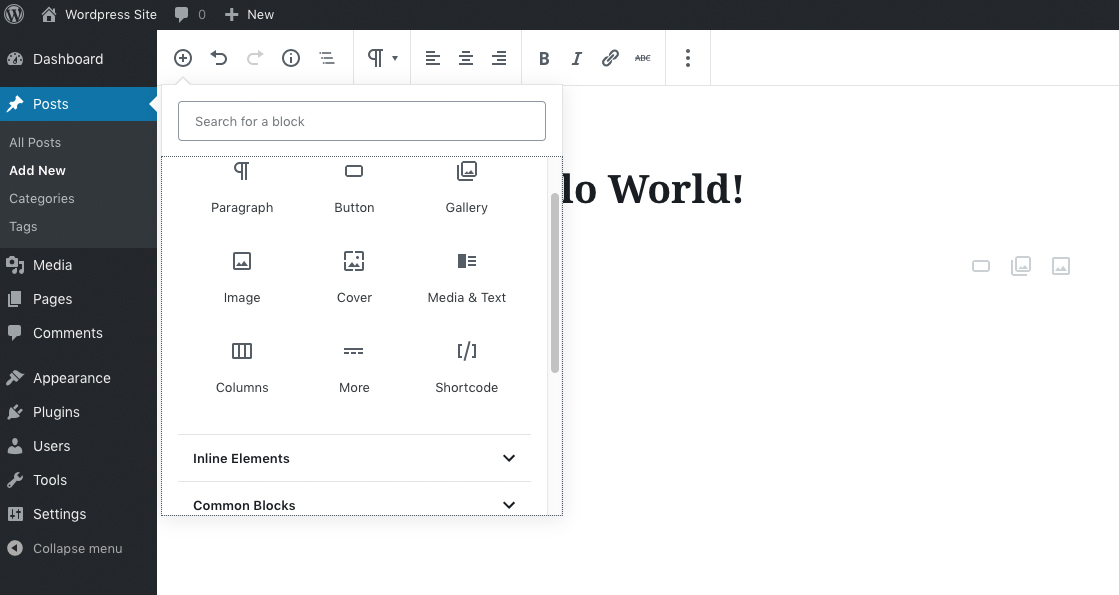
In the drop-down menu, you can select several dozen content blocks, such as images, galleries, videos, columns, headings, etc.
For example:
You want to add a new paragraph. Click the Plus button in the top left corner and click on the Common Blocks tab. Click on the
Paragraphicon.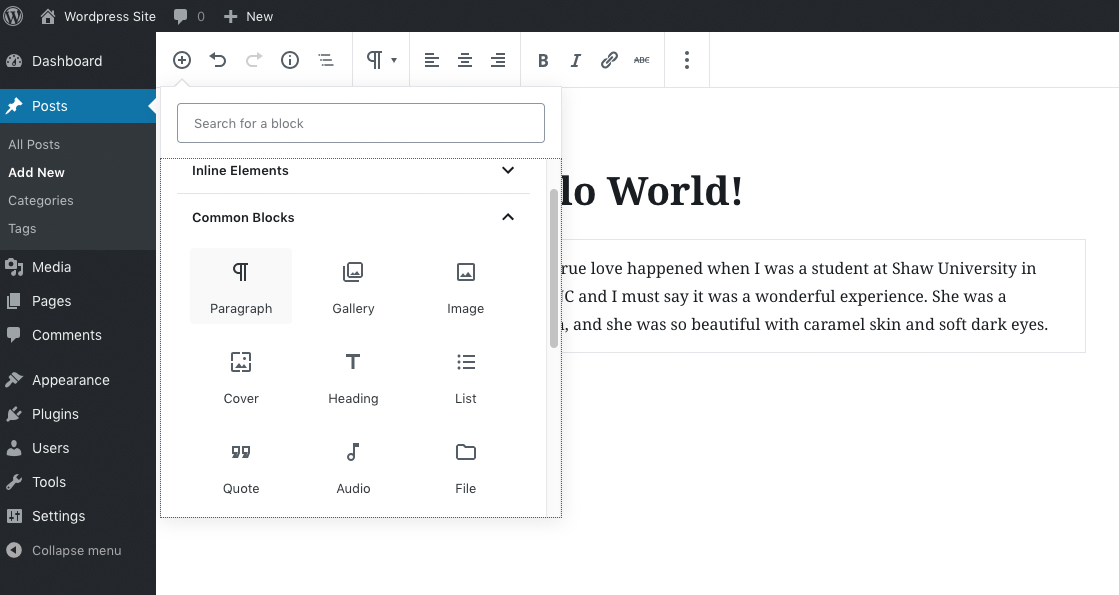
After the last paragraph, a new text field will appear where you can write a new paragraph.
In the same way, you can add images, videos, columns, headlines and many other elements of the post.
Each content block has personal display settings. You can change the font size, color, background, indents and other parameters of the block. Click on the block you want to change. The parameters of the block are displayed right side of the post editor.
For example:
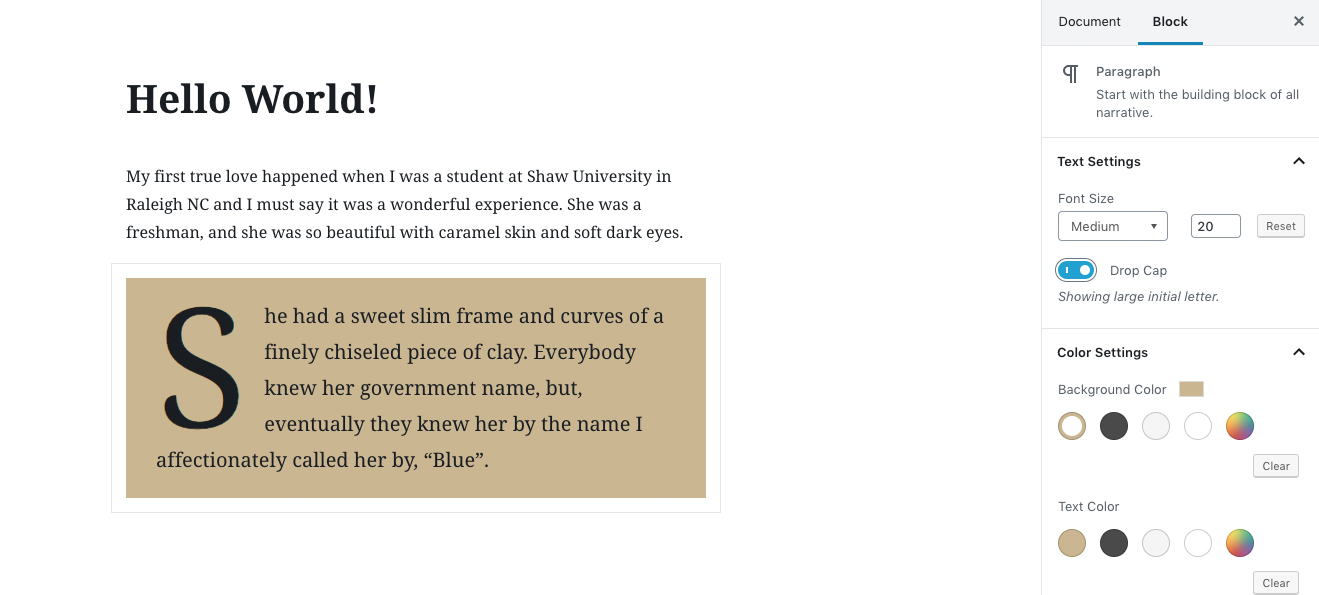
Click on the block with the last paragraph. The settings for changing the size and color of the font will appear on the right side of the editor.

After changing the font size and block color, you can get this block:
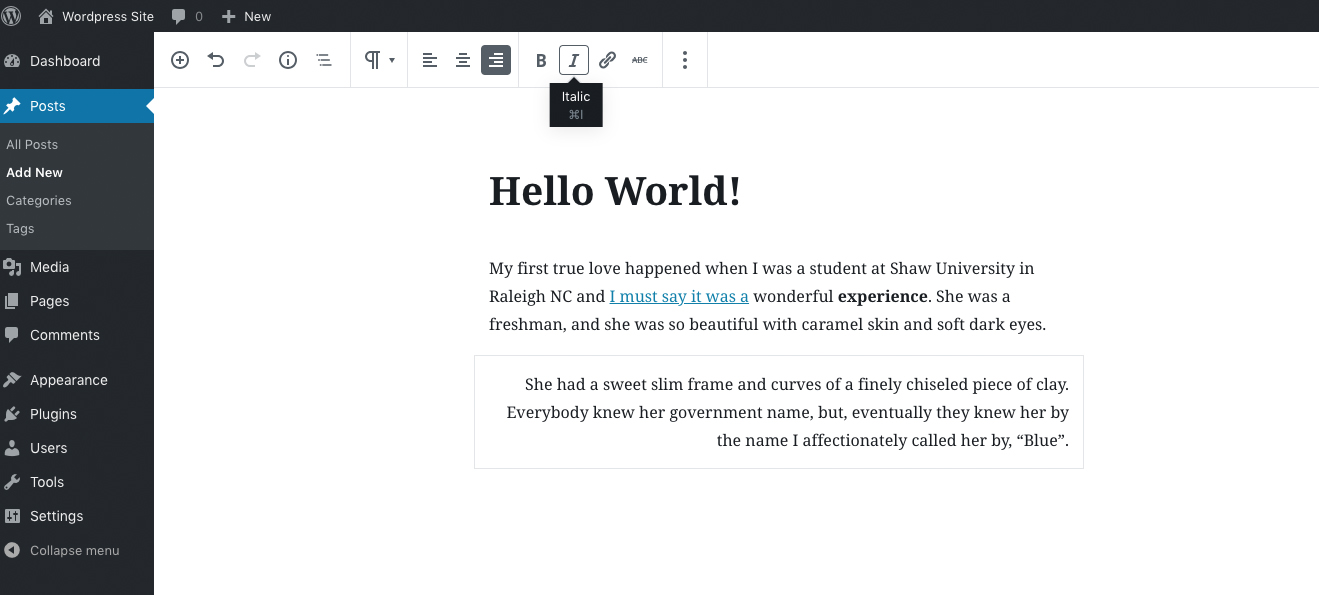
To add links to your post and change the boldness and inclination of the font, use the toolbar located at the top of the screen.
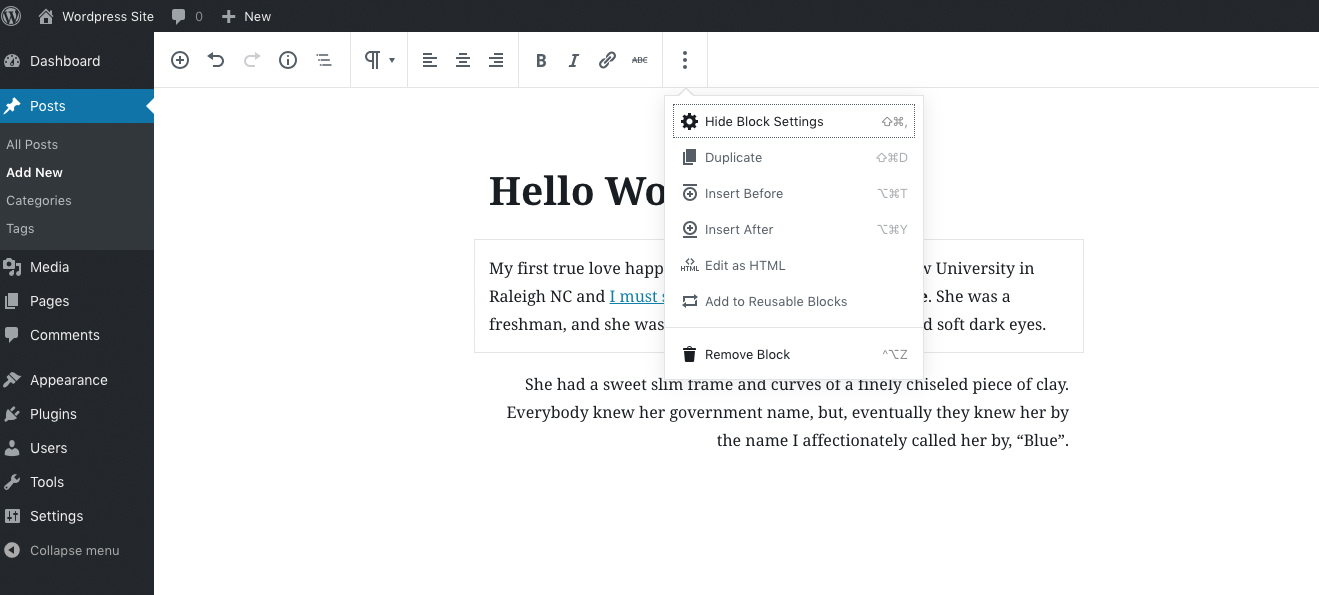
To remove a block, select the block and click the More Options icon in the top toolbar. In the drop-down menu, click Remove Block.
When you have finished creating your blog post, select a category and add post tags. Click the Document tab on the right sidebar of the post editor. Then click the Category tab. Select categories or create new ones. Do the same with tags.
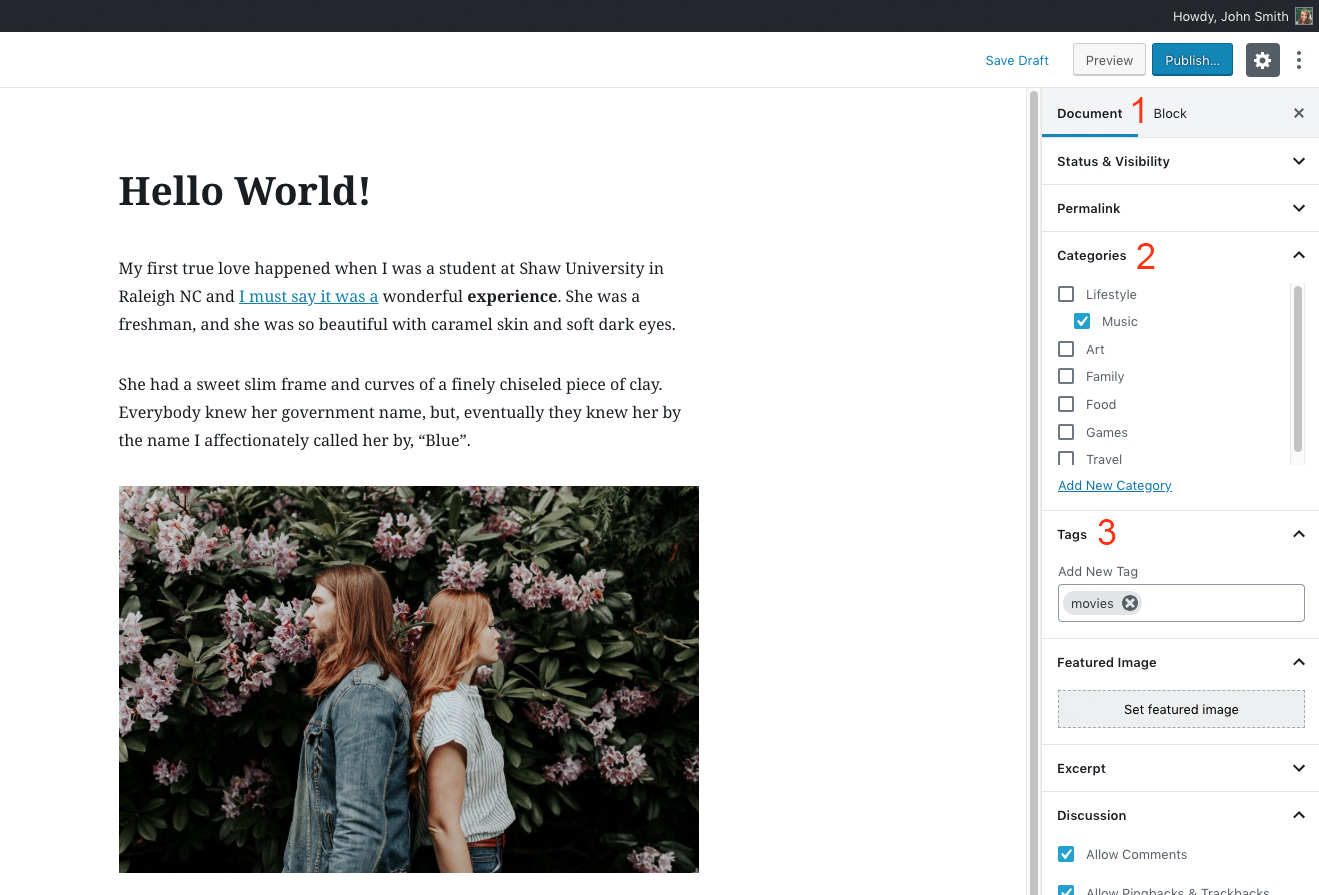
- When you are done click the Publish button. Now your post has been published and visitors to your site can read it.
Editor Blocks
More information about the editor blocks can be found on the following resources:
«Continue reading» button
Do you want to a show a summary of your article on your homepage with a read more link? Adding the More Tag in your posts is quite simple.
- Start a creating new post. Enter the title of the post and add blocks.
Click the Plus button in the upper left corner. Click on the Layout Elements tab. Click the More button.
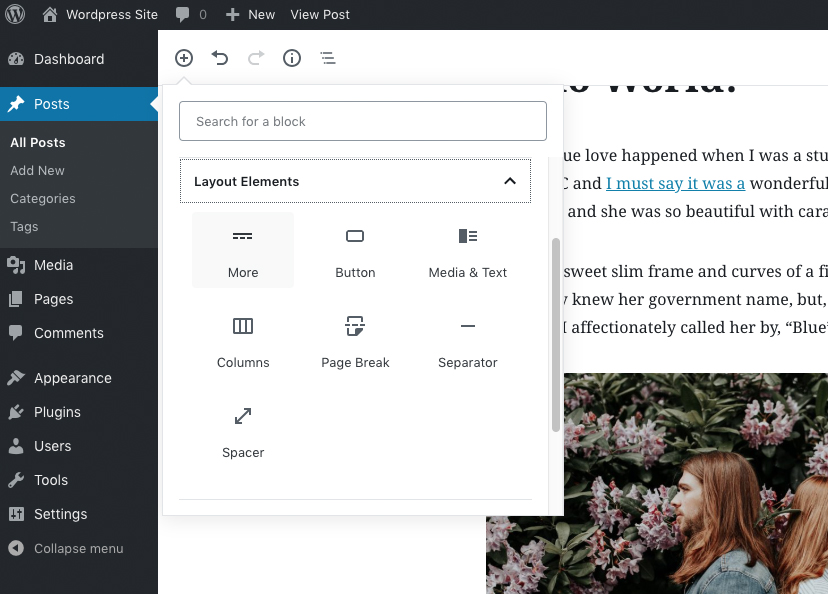
-
Once you click the More button, you'll see the dividing line appear in your post.
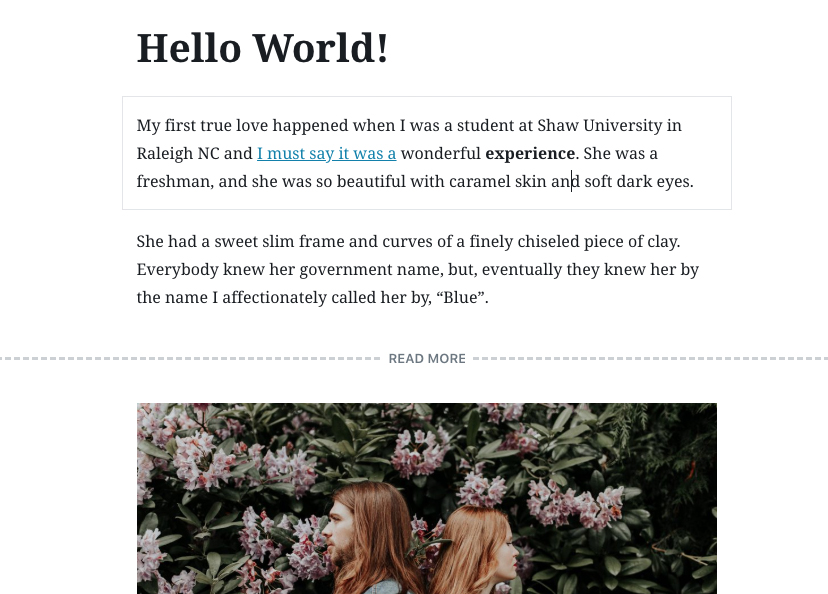
-
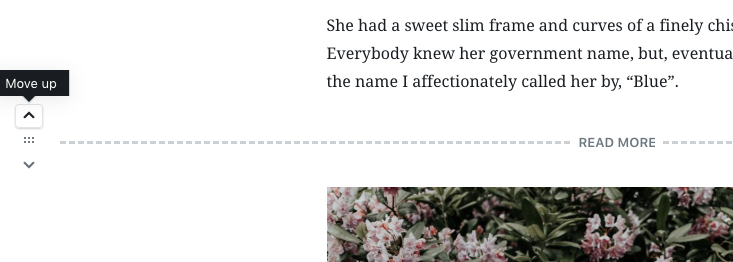
If you want to move the line, click on the arrow icons located to the left of the dividing line.
- When you are ready, click the «Publish» button.
Sticky (Featured) Post
A Sticky Post (Featured post) is the post will be placed at the top of the front page of posts. Making Sticky Posts in WordPress is really easy.
- Log in to your WordPress Administration Panel (Dashboard).
- Start creating a new post or open an existing post in edit mode.
- Click the
Documenttab on the right sidebar. Then click theStatus & Visibilitytab. Check the
Stick to the front pagebox.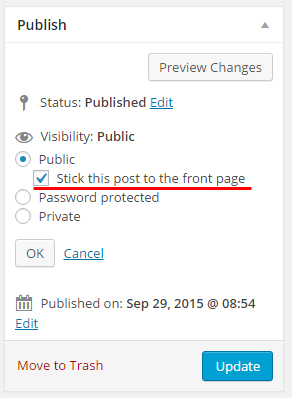
- When you are ready, click the «Publish...» button.
Featured Image
Featured images (also sometimes called Post Thumbnails) are images that represent an individual Post, Page, or Custom Post Type. Featured images are always displayed at the top of the post (after the title), as well as in search results and widgets. To set a featured image of the post, follow the steps:
- Log in to your WordPress Administration Panel (Dashboard).
- Start creating a new post/page or open an existing post/page in edit mode.
Click the
Documenttab on the right sidebar. Then click theFeatured Imagetab.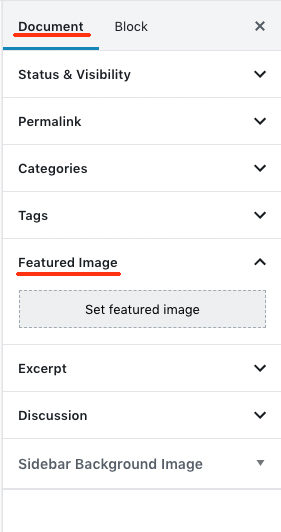
- Click the
Set featured imagebutton. Select or upload an image in the Media Library window and click the
Selectbutton. The selected image should appear in the Featured Image block.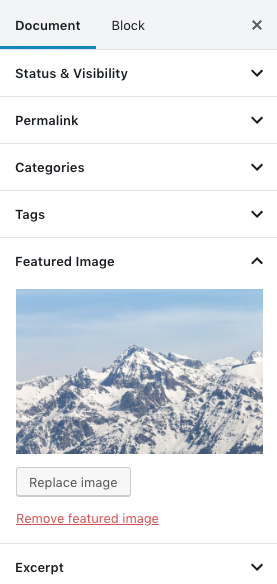
- When you are ready, click the «Publish...» button.
Sidebar Image
Each post or page can have a individual background image of the sidebar. To set a sidebar background image, follow the steps:
- Log in to your WordPress Administration Panel (Dashboard).
- Start creating a new post/page or open an existing post/page in edit mode.
Click the
Documenttab on the right sidebar. Then click theSidebar Imagetab.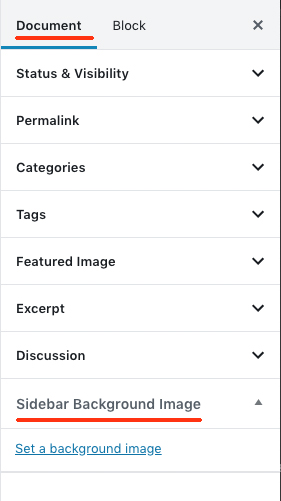
- Click the
Set sidebar imagebutton. Select or upload an image in the Media Library window and click the
Choose Imagebutton. The selected image should appear in the Sidebar Image block.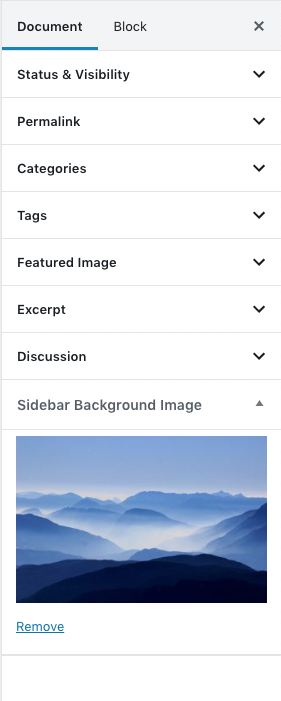
- When you are ready, click the «Publish...» button.
Grid Gallery
Image galleries are a great way to show groups of pictures on your site. The process of creating a gallery is simple and does not take much time.
- Start creating a new post/page or open an existing post/page in edit mode.
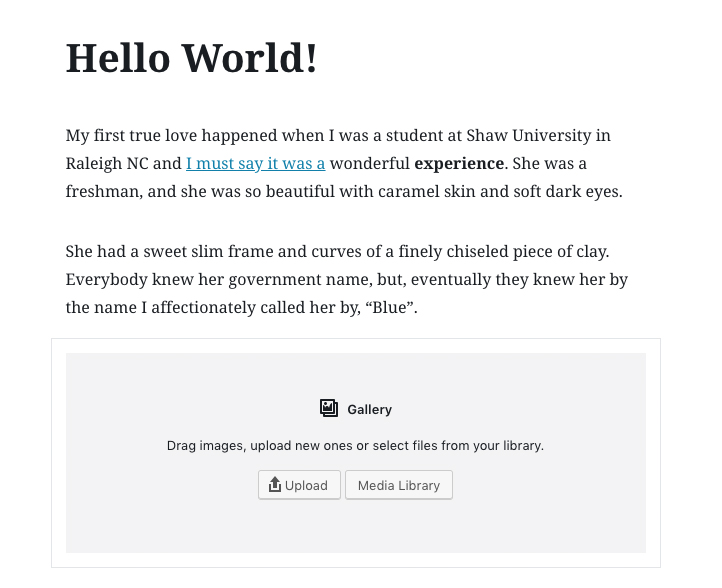
- Click the Plus icon in the upper left corner. Open the Common Blocks tab and click the Gallery icon.
Once you have clicked the icon a new block called the Gallery appear in the editor.
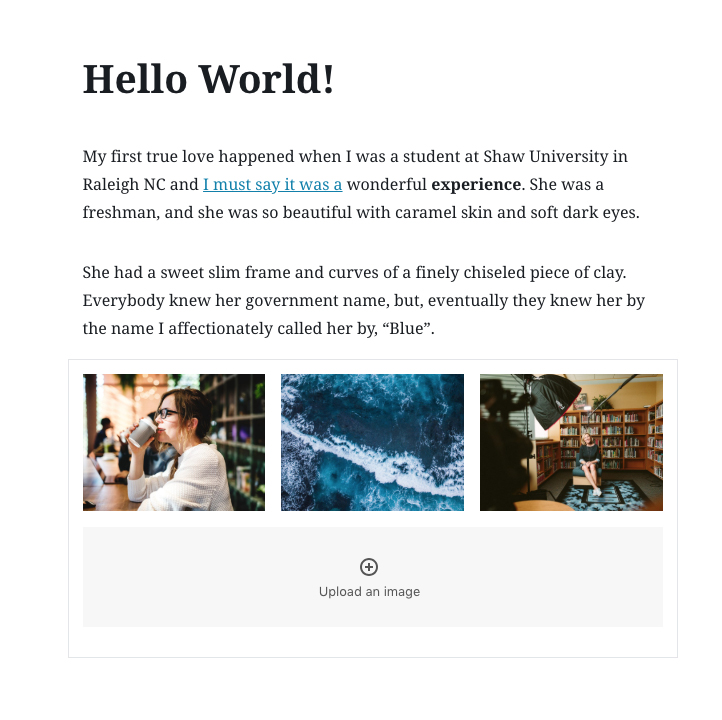
You can choose gallery images in two ways::
- Select existing images in the Media Library
- Upload new images from your computer.
When you have finished selecting images for the gallery, click the Create new gallery button to insert the gallery onto the page.
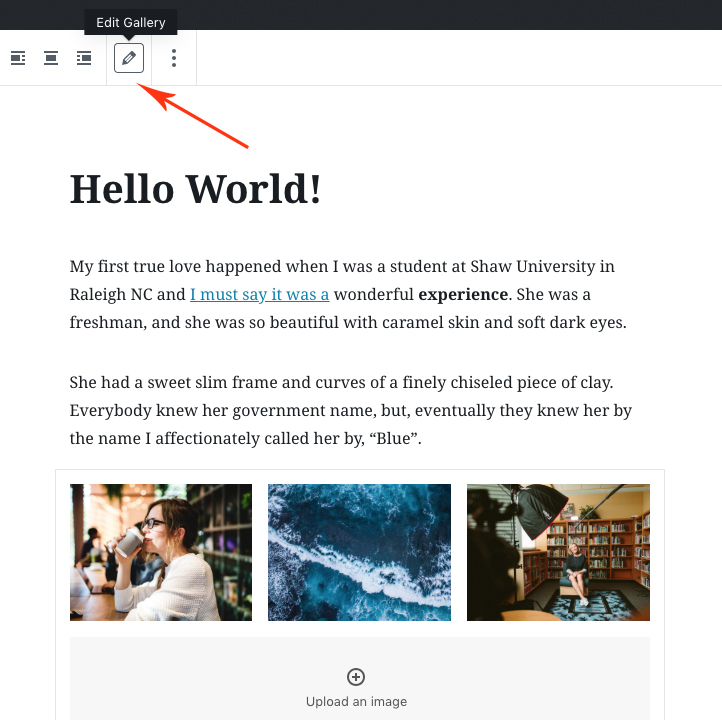
To add or remove gallery images, click the Pencil icon in the top toolbar.
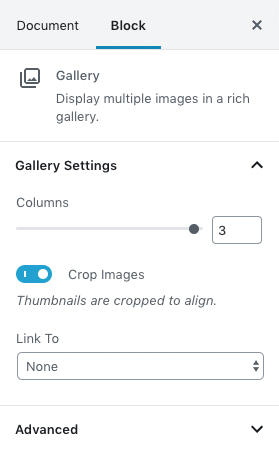
Gallery display options are in the right sidebar of the editor. You can change the following parameters:
- Columns: Range slider to adjust the number of columns of the gallery.
- Crop Images: If you switch to the On position, all images are cropped to the equal height.
- Link to: You can set the images to link to "media file" or "attachment page". It's set to "none" by default.
- When you are done, click the «Publish...» button.
Carousel Gallery
The theme supports an additional type of gallery — carousel (slider) of images. The process of creating a slider is slightly different from the process of creating a standard gallery because requires the use of a classic editor.
- Start creating a new post/page or open an existing post/page in edit mode.
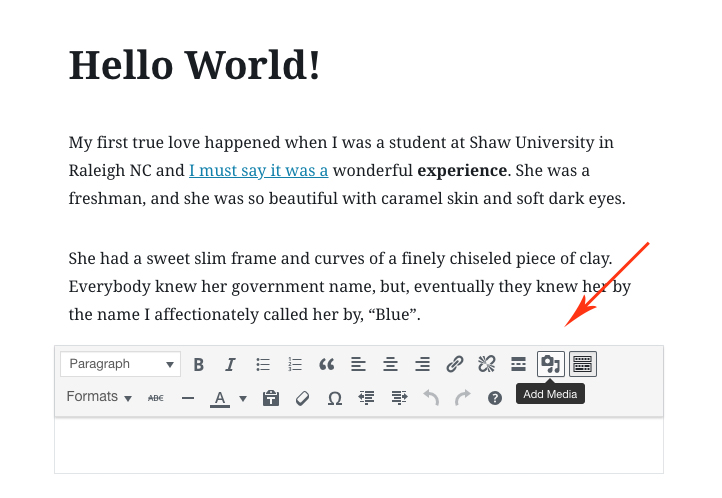
Click the Plus icon in the upper left corner. Open the Formating tab and click the Classic icon.
Click the Add Media button in the classic editor block.
- In the Media Library window that opens, click Create Gallery.
- Select images form the Media Library (or upload new images) and click the Create New Gallery button.
On the next screen, open the Type drop-down menu and select Carousel. Click the Insert button.
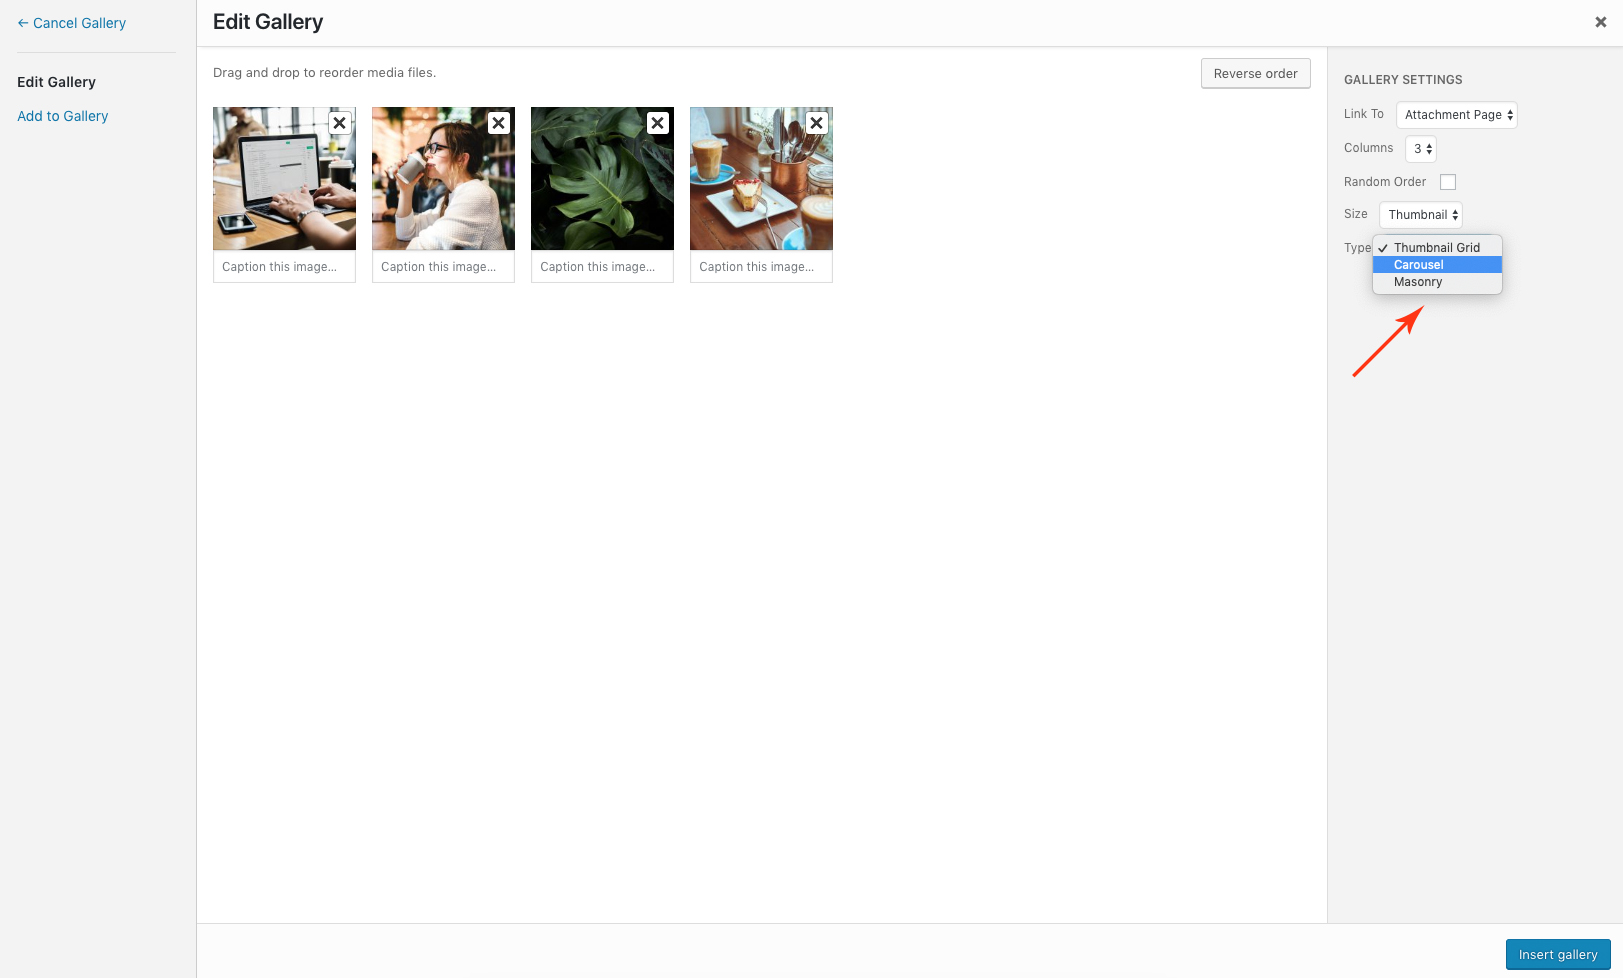
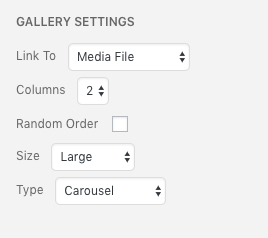
Also do not forget to choose the size of the images and the number of columns.
Once you are done, a grid of images will be added to the classic editor. In the editor, the gallery will be displayed as a grid of thumbnails, but on the site you will see a carousel of images.
- When you are done, click the «Publish...» button.
Masonry Gallery
Also the theme supports another gallery type — masonry (mosaic). The process of creating a masonry gallery is the same as the process of creating a carousel of images. In the Type drop-down menu, select Masonry instead of Carousel.
Share Buttons
Share buttons allow your visitors to easily share your posts and pages on their own social media accounts. To enable the buttons install and activate the Weeland Share Buttons plugin.
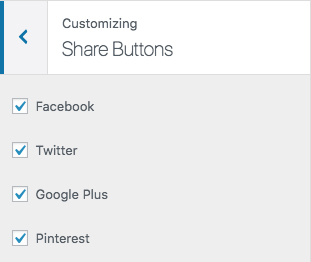
Buttons Display Options
To enable or disable some sharing buttons, follow these steps:
- Log in to the WordPress Administration Panels.
- Navigate to Appearance > Customize menu.
- Open the
Share Buttonstab. Then open the Display Options tab. - Check the boxes of the social networks what you want to display after the page content.
- Click Save & Publish button.
Static Home Page
By default, WordPress shows your most recent posts in reverse chronological order on the front page of your site. Many WordPress users want a static front page or splash page as the front page instead. This "static front page" look is common for users desiring static or welcoming information on the front page of the site.
The look and feel of the front page of the site is based upon the choices of the user combined with the features and options of the WordPress Theme.
There are four models for WordPress layout and structure, three that include static front pages.
- Blog: This is the traditional front page format with posts featured in reverse chronological order.
- Static Front Page: This is a traditional static HTML site model with a fixed front page and content placed in Pages, rarely if ever using posts, categories, or tags.
- Static Front Page Plus Blog: This model features a static front page as an introduction or welcome plus a blog to manage posts. Pages may be used to provide timeless content such as Contact, About, etc.
- Dynamic Front Page: Sometimes called the integrated model, the dynamic site design features a static front page plus blog, however the front page is dynamic. It may feature a combination of static and blog content (Page and posts). The Twenty-Eleven WordPress Theme offers that feature as an example with their Showcase Page Template. It features the most recent post in full or excerpt followed by the next most recent posts as post titles. There is an option to add a slider for featured posts set as Sticky Posts above the first post, creating a dynamic mix of content on the front page.
WordPress Static Front Page Process
There are two steps critical to creating a static front page on your site with WordPress.
- Assign the Front Page
- Assign the Posts Page (blog page)
The Page assigned as the front page of the site will display the static information you wish readers to know. It may be customized to direct people to welcome or offer instructions, featured content, highlight specific posts, articles, categories, or contributors.
The Page assigned as the blog page (posts page) of the site displays posts in reverse chronological order. Posts set as Sticky Posts will stick to the top of the queue, and navigation and organization of post content is through categories and tags.
Creating a Static Front PageCreating a virtual static front page does not require editing or coding of files or templates. Using the default configuration for a "static front page" in WordPress does not remove the sidebar or change the look of the entire site, just the content area.
Please note that the names for the Pages used in these examples are web standardized names. You may choose alternative titles.
To create the static front page, go to the WordPress Administration Panels.
- Create a Front Page: In Pages choose Add New Page.
- Title it "Home".
- If the WordPress Theme offers an option to change the look and feel of the front page, select the Template in the Page Attributes panel box.
- Add content you would like to see within the content area of the static front page, or leave it blank if it is a Dynamic front page.
- Publish the Page.
- Title it "Home".
- Create a Blog Page: If choosing to add a blog, choose Add New Page again.
- Title it "Blog," "News," "Articles," or an appropriate name.
- Do not use a custom Page template for this page. The template files home.php or index.php will be used to generate this page in the Theme.
- DO NOT add content. Leave it blank. Any content here will be ignored -- only the Title is used.
- Publish the Page.
- Title it "Blog," "News," "Articles," or an appropriate name.
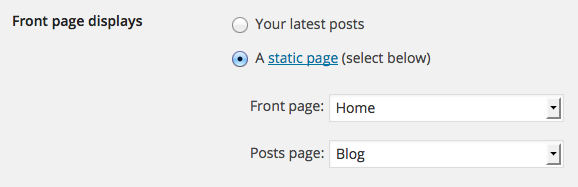
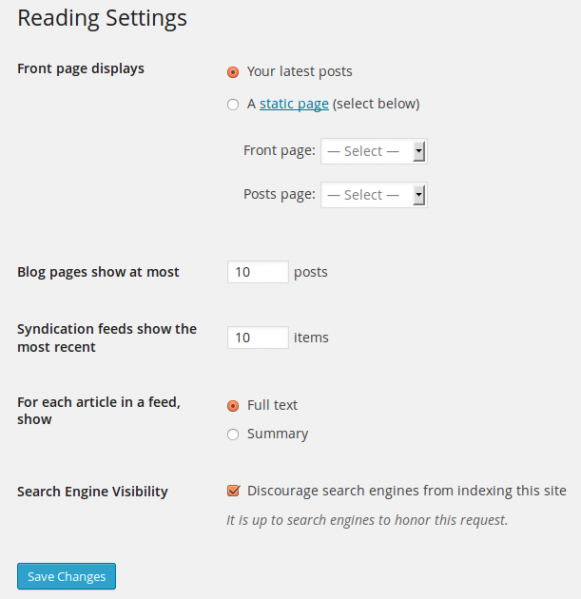
- Go to Administration > Settings > Reading panel.
- Set Front page displays to a static page
- In the drop down menu for Front Page select "Home."
- In the drop down menu for Posts page select "Blog" or the name you created, or leave it blank if you will not feature posts on the site.
- Save changes.
- Set Front page displays to a static page
Authors & Users
Author Info
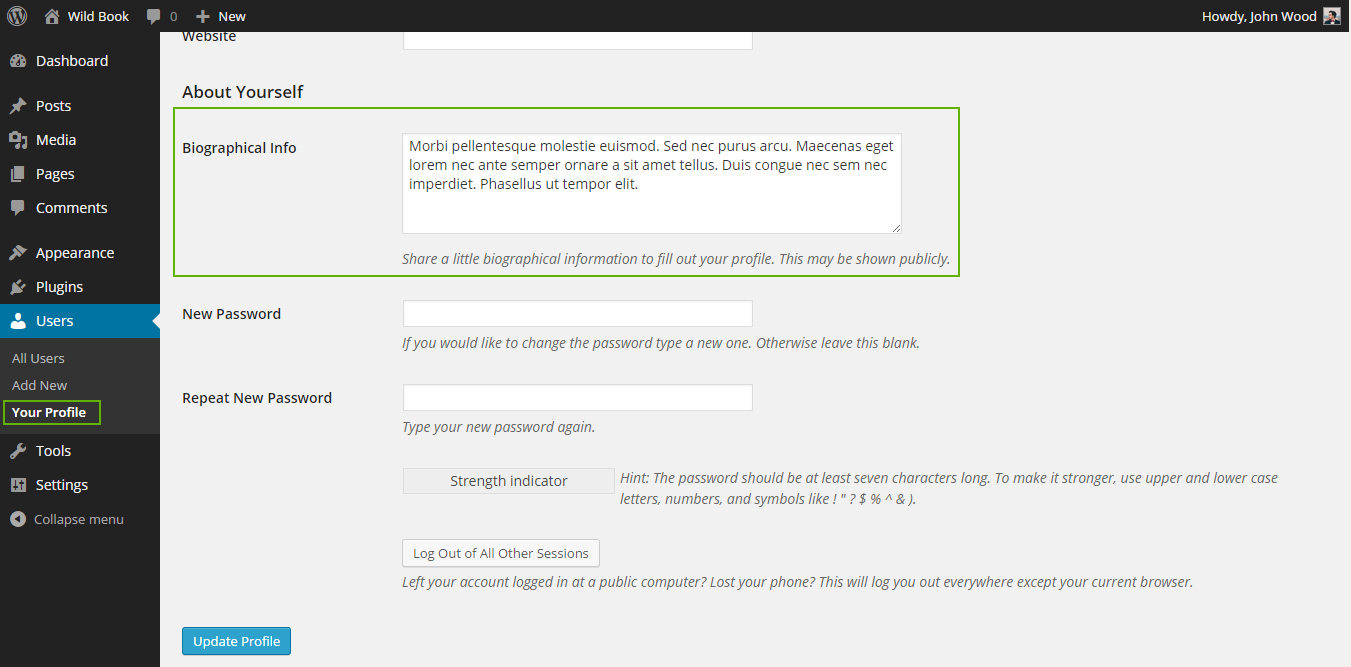
After each post, you can display a block with a brief biography of the author. To add a biography of the author, follow these steps:
- Log in to your WordPress Administration Panel (Dashboard)
- Navigate to the
Users > Your Profilemenu. - Enter your biography text to the Biographical Info field. You can use a HTML tags.
- Click the
Update Profilebutton.
Contact Page
This guide is an introduction to the Contact Form 7 plugin for WordPress. Basic knowledge of WordPress administration is required. With various examples, this tutorial explains how to display a form on your page, and how to customize your forms and mail.
First Steps
Before you create a contact form, install and activate the Contact Form 7 plugin. If you already have Contact Form 7 plugin installed, you can skip this step.
Creating Contact Page
Let’s start with displaying a form on your page.
- First, open the
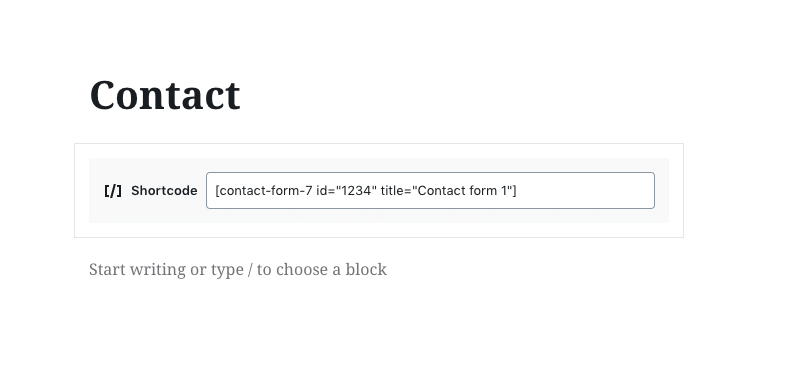
Contact > Contact Formsmenu on your WordPress administration panel. You can manage multiple contact forms there. Just after installing the Contact Form 7 plugin, you’ll see a default form named “Contact form 1”, and a code like this:
[contact-form-7 id="1234" title="Contact form 1"]
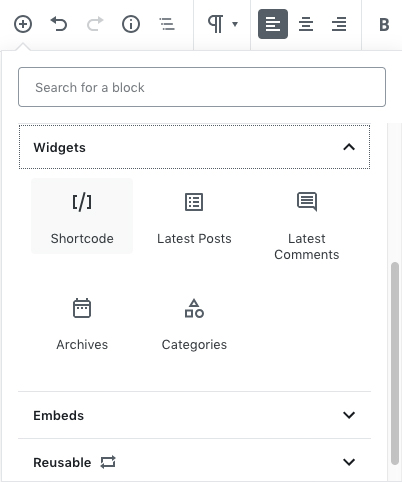
- Copy this code. Then, open the edit menu of the page (
Pages > Edit) into which you wish to place the contact form. A popular practice is creating a page named “Contact” for the contact form page. Click the Plus icon in the upper left corner. Then open the Widgets tab and click the Shortcode button.
-
Paste the code you copied into the Shortcode block.
- Click the «Publish...» button.
- Now your contact form setup is complete. Visitors to your site can now find the form and start submitting messages to you.
Next, let’s see how you can customize your form and mail content.
Customizing a Form
You may feel that the default form is too simple for you and you want to add more fields to it. You can edit the form template in the admin screen and add other fields.
To add fields to a form, make tags for them and insert them into the ‘Form’ field. You’ll find unfamiliar codes in the ‘Form’ field, for example, [text* your-name]. These codes are called “tags” in the vocabulary for Contact Form 7.
A tag has a rather complex syntax, but don’t worry! You don’t have to learn it. You can use the “Generate Tag” tool to generate as many tags as you want.
The second word in the tag is its name. For example, the name of [text* your-name] is ‘your-name.’ This name is important as it is used later in your mail template.
Customizing Mail
You can edit mail templates in the ‘Mail’ field set as you did with the form template. You can use tags there as well, but note that tags for mail are different from those tags for forms.
Tags you can use in a mail template contain only one word in brackets and look like [your-name]. You should be aware that this ‘your-name’ is the same as the name of the form tag which is noted in the previous example. The two tags correspond with the same name.
In mail, [your-name] will be replaced by the user’s input value, which is submitted through the corresponding form field, which, in this case, is [text* your-name].
More Info
More information and tips can be found on the official documentation website.
Footer Widgets
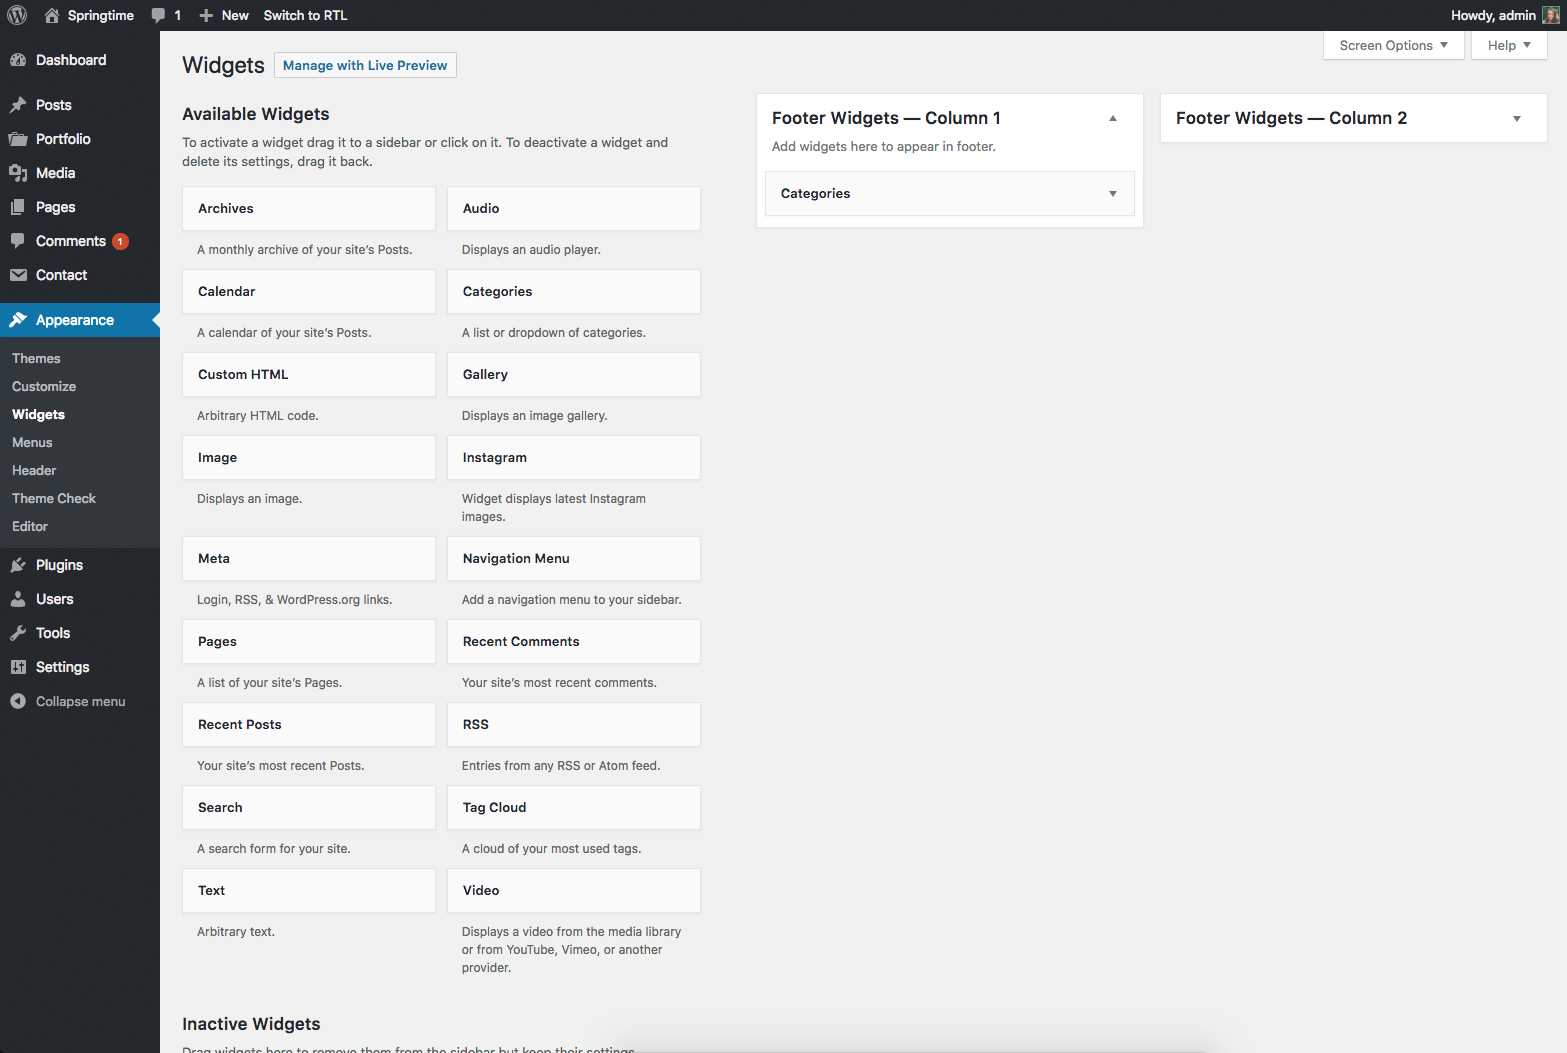
Weeland theme has three areas widgets located in the footer of the site. To add widgets to the footer of your site, follow these steps:
- Log in to the WordPress Administration Panels.
- Navigate to the
Appearance > Widgetsmenu. - Choose a Widget and either drag it to the sidebar where you wish it to appear, or click the widget, (select a destination sidebar if your theme has more than one) and click the Add Widget button.
- Preview the site. You should find that the "default" sidebar elements are now gone and only the new addition is visible.
- Return to the Widgets Panel to continue adding Widgets.
- To customize the Widget features, click the down arrow in the upper right corner to expand the Widget's interface.
- To save the Widget's customization, click Save.
- To remove the Widget, click Remove or Delete.
Instagram Widget
- Log in to the WordPress Administration Panels.
- Install and activate the Smash Balloon Social Photo Feed plugin.
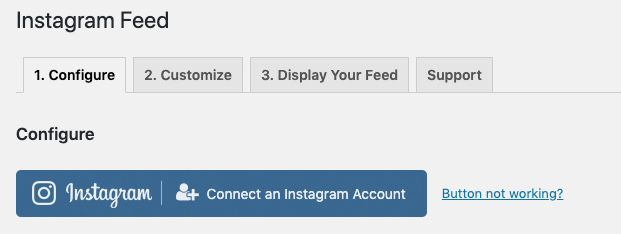
- Then navigate to
WP Admin -> Instagram Feedpage. Click the Connect an Instagram Account button.
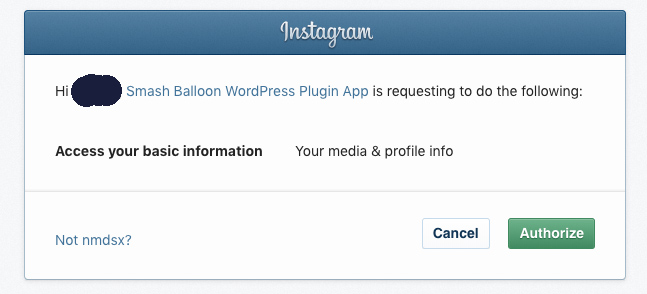
Sign in to Instagram with your account. Then click the Authorize button.
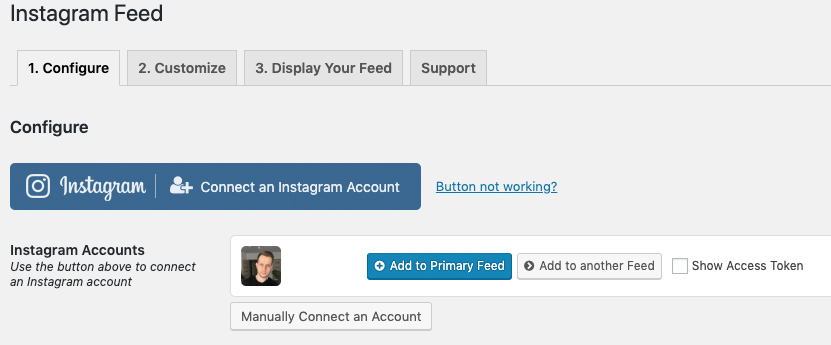
Once you’ve connected your Instagram account you will see your account on Instagram Feed page.
Then navigate to
WP Admin -> Widgetspage. Add the Text widget to Widget Area block. Enter the[instagram-feed]shortcode in the text editor window.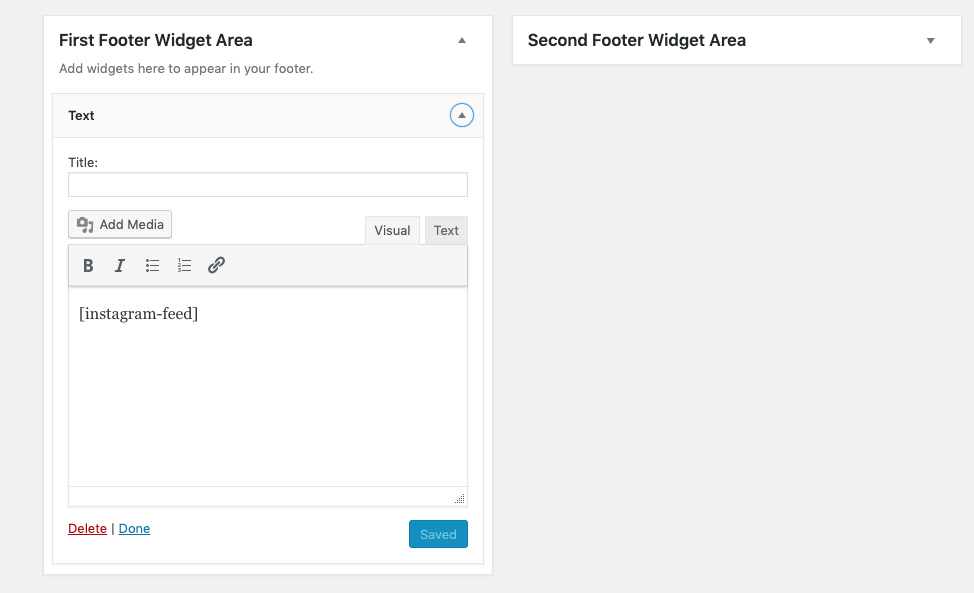
The Instagram widget will appear in the footer of your site. If you want to customize the appearance of the Instagram feed, go to the page Instagram Feed. Click the 2.Customize tab. On this page you will find many settings for changing the appearance of the Instagram feed.
Subscribe Form Widget
To add a subscription widget to your blog, you need to install and activate the MailChimp for WordPress plugin.
MailChimp is an email marketing platform. This kind of service is typically used for creating email newsletters or advertisements that people opt-in to receive, often by entering their email address into a form on your website.
You can integrate MailChimp with social media services and your applications to collect contacts for your lists of recipients.
Emails sent by MailChimp on your behalf comply with anti-spam regulations, which is important to reduced the chance that your messages will be filtered into spam.
First Steps
Before installing the widget, you need to create account on the MailChimp site and get a unique API key.
- Go to the MailChimp site and create a new account.
- Generate the API key in your account page. How to generate MailChimp Api key.
Installing the plugin
- Log in to the WordPress Administration Panels.
- Navigate to the
Plugins > Add Newmenu. - Type
MailChimp for WordPressinto the Search Plugins field and hit Enter. - In the search result navigate to the block with "MailChimp for WordPress" title and click
Install Now. - Wait a few seconds and click
Activatebutton. - Now the widget is installed and ready to use.
Connecting to MailChimp
Before using the widget, you need to connect to the MailChimp service.
- Log in to the WordPress Administration Panels.
- Navigate to the
MailChimp for WPin the left side menu. - In the
MailChimp API Settingssection enter your API key to theAPI Keyfield. - Click
Save Changes.
When you finished go to Appearance > Widgets and add the MailChimp Sign-Up Form to one of the widget areas.
If you want to change Subscribe Form go to MailChimp for WP > Forms and edit the form in the Form Fields field.